Skillet hash browns

Being of Eastern European descent, potatoes have always been, and will probably always remain, a huge part of my diet. My mom would serve them boiled, roasted or mashed (my favorite) as a side, or fried, as a main course. They were also in every soup and on every holiday table. We didn’t choose to eat them - they just happened to be one of the only ingredients available in abundance. I believe the Irish suffered a similar fate.

Bon Appetit skillet hash browns

Then, when I was about seven, a McDonald’s opened in Odessa and I got to try French-fried potatoes. I found them to be extraordinaire, of course. It wasn’t until we immigrated to the States that I learned of such wonderful items as shepherd’s pie, waffle fries, croquettes or potato pancakes. And it wasn’t until I read the May 2013 issue of Bon Appetit magazine that I thought this large skillet hash brown cake possible!

Bon Appetit skillet hash browns

This recipe is super easy and really fun to make. It calls for few ingredients and is a great way to jazz up a boring potato repertoire - Ukrainian, Irish or otherwise.

Bon Appetit skillet hash browns

The hash browns turned out great and cooked faster than I had anticipated, with a crisp, salty outside and soft inside. I toyed with the idea of adding more seasonings (say, rosemary) but in the end I was glad that I didn’t. Sea salt, freshly cracked pepper and the clean flavor of scallions are all this dish needed. I do think adding an egg to the potatoes would have made the pancake even more crispy and sturdier, though. Get the full recipe here.

Bon Appetit skillet hash browns

Grilled corn w/ Parmesan herb butter

To me, corn screams summer. Literally.

Grilled corn with herb butter

When I was little, my mom used to take my sister and I - often accompanied by other neighborhood kids - to the beach. Every day, of every summer, of the first nine years of my life (while we still lived in Odessa). And everyday, there were ladies walking up and down the beach, screaming, “Hot corn! Hot corn!” (in Russian, of course). When you called for one of these ladies, they would come over and present you with a steaming hot cob of corn, along with a salt shaker for you to season to your liking. So no, we did not eat fruit roll-ups or Lay’s chips as snacks. We ate corn. The bursting sweet corn make us all giddy, and between that, the warm sand, the gentle sea breeze and my angel of a mother, I could not have asked for better summers.

Grilled corn with herb butter

This corn, however, is something I would not have even thought possible back then. It is an exciting, jazzed up version of one of my favorite childhood foods, and it is so good and easy to make. It makes for a great snack, or side dish at a barbecue or weeknight dinner.

From an aesthetic point of view, it would be best to leave the cheese out of the herb butter and just sprinkle it on afterwards, but I decided to mix it in. You can use whichever method you prefer.

(Yield: 8 pieces)

Ingredients:

4 ears of corn, husked

1 tbsp olive oil

2 tbsp butter, at room temp.

1 garlic clove, crushed

2 tbsp finely chopped cilantro

2 tbsp Parmesan cheese

1/2 tsp sea salt

1/2 tsp freshly ground black pepper

Cayenne pepper, to taste

Procedure: Start by making the herb butter - place the butter, garlic, cilantro, cheese, salt and peppers into a dish with a flat bottom and mash together with a fork. (If you can avoid eating all of it at this point, I applaud you).

Grilled corn with herb butter

Heat a grill pan over high heat. Lightly brush the corn with olive oil and place on grill. Cook for 15-20 min, turning occasionally, until the corn is evenly charred throughout. Remove from grill and place on a cutting board. Working with one piece at a time, hold down corn with an oven mitt and cut in two pieces. Then place corn onto a platter and divide the butter evenly among the pieces, using a butter knife to spread it. Serve immediately.

Grilled corn with herb butter

What to do with frozen peas

We all have that sad, lonely, dejected bag of peas in the freezer, right? They’re right next to that half-empty pint of rainbow sorbet from two summers ago. We buy the peas with good intent but somehow the damn things always get overshadowed by pasta, chicken or even canned tuna - basically any other kitchen staple that’s not peas. As far as I’m concerned, their only real purpose is as an ice pack, for handsome men like Ryan Gosling who happen to have been punched in the face. I mean, we could just add them to our soups, stews, rice, etc. but we forget they’re even there.

Garlic peas (2) copy

Below is a recipe for what to do with a large quantity of peas that’s so easy, it literally consists of three ingredients (not counting salt and pepper). The peas turn out flavorful and dare I say desirable, and make a fantastic side dish for just about anything.

Sauteed Garlic Peas

(Yield: 4-6 servings)

Ingredients:

2 tbsp extra virgin olive oil

3 garlic cloves, thinly sliced

2 c frozen green peas

A pinch of salt and freshly grated black pepper

Procedure: Heat the oil in a large, high-sided skillet over medium-low heat. Add garlic and saute for 1 min, just until fragrant. Add peas, stir and cook until softened and warmed through, stirring frequently, 7-8 min. Taste and re-season if necessary. Serve hot or at room temperature.

Garlic peas (16) copy

How do you like to use frozen peas?

Anticipation & garlic roasted Brussels sprouts

I was going to write an elaborate review of a renown pizza restaurant that I recently visited as today’s post but couldn’t bring myself to do it. My mind is a bit preoccupied right now because I’m flying out to Paris - which is like, my favorite place in the world - tomorrow night. I know, I know, I should be jumping-up-and-down, can’t-keep-my-pants-on, bragging-like-an-***hole, excited right now. But instead, I am nervous and a little scared. This is the first time I’ll be flying by myself, and to a foreign country, at that. Hopefully my nerves will calm as soon as I land across the ocean and this turns out to be as fantastic a trip as I originally anticipated.

There will be no new posts for the next 12 days or so, but follow me on Twitter, Instagram and Facebook for updates!

Garlic roasted Brussels sprouts  (8) copy

Here is a simple, healthy, vegan recipe for Brussels sprouts that is inspired by, oddly enough, the Provencal-style roasted potatoes at Home/made in Red Hook.

(Yield: 4 servings)

Ingredients:

1 lb Brussels sprouts

3 tbsp olive oil

1 tsp dried thyme

8 garlic cloves with skins intact

1/2 tsp salt + 1/2 tsp pepper

Procedure: Heat oven to 400F. Wash sprouts and pat dry. Trim bottoms, peel off outer layer and cut in half lenghtwise. Scatter onto baking sheet and toss with remaining ingredients. Roast 35-40 min, flipping twice while roasting, until sprouts are brown on the outside and mushy on the inside. Serve hot.

Spiced refried beans

I wish I could write a witty little intro blurb about this bean recipe - a sort of literary version of the Mad Men dancing-in-slow-motion Heinz beans (some of you must know what I’m talking about, right?) - but I cannot. Beans are beans, and they are not romantic. Beans are a utilitarian, cheap, peasant food. And like many other peasant foods, beans are versatile, nutritious and filling. Pinto beans, for instance, have 100 calories per one 1/2 cup serving, and they are high in fiber, protein and help decrease cholesterol. Although they’re not very dreamy, beans are definitely worth incorporating into your diet.

Spiced refried beans

These beans can be a dip, topping or side dish.

Ingredients:

2 15 oz cans pinto beans, drained, rinsed

1 large onion, diced

2 garlic cloves, minced

1/2 c water

2 tbsp olive oil

1/2 tsp nutmeg

1 1/2 tsp chili powder

1/2 tsp paprika

1/3 cayenne pepper

Salt and freshly ground black pepper

Procedure: Pour half of the beans into a blender with water and puree. Set aside. Heat oil in large skillet over medium heat. Add onion and garlic with a pinch of salt and cook until softened, about 4 min. Add beans and bean puree along with spices and a pinch of salt and pepper, and cook, stirring frequently, for about 3 min - until beans are warmed through. (Add more water if thinner consistency is desired).

Spiced refried beans

Taste and re-season if necessary. Serve hot.

Spiced refried beans

What are your favorite ways to prepare beans?

Easy Asian-style vegetables for hard times.

Dearest readers: Please note that in the coming weeks, new blog posts will probably be scarce. There are about three weeks left of this semester (finals included) and if all goes well, I will be a college graduate come January. But until that day comes, I have to focus as much as possible on my schoolwork. I have so many papers due that I’ve lost count of them, and I haven’t even thought about cracking a book to study for final exams yet. I also have to start applying to big girl jobs soon and the mere idea of it is simply paralyzing.

If I survive this whole ordeal, I will re-commence blogging at full speed as soon as I can - you have my word. So please don’t forget about me and my baby (…ahem, this blog) in the meantime.

Asian sauteed vegetables

This recipe is for times when you need to eat something good, fast, and refuse to succumb to take-out.

(Yield: 4 servings)

Ingredients:

1 tbsp veg oil

1 tbsp sesame oil

8 oz baby bella mushrooms, trimmed and sliced

3 bulbs baby bok choy

1/4 c low sodium soy sauce

1 tsp corn starch

2 garlic cloves, minced

1 tbsp freshly grated ginger root

Procedure: (Cut off 1″ from the bottom of bok choy bulbs and separate leaves. Rinse and dry). In a bowl, combine soy sauce, corn starch, garlic and ginger. Stir until starch is dissolved and set aside. Heat both oils in a sauté pan or wok over high heat. Add mushrooms and cook until browned, about 3 min. Then add bok choy. Cook until wilted while continually stirring, 1-2 min. Then stir in soy sauce mixture; cook until sauce is thickened and bok choy is fork tender, about 1 min. Serve immediately; over rice, if preferred.

“Paula’s Tomato Grits” from James Villas’ The Glory of Southern Cooking

One fine day, I “liked” a fellow blogger’s Instagram photo of this glorious dish and asked for the recipe. The next thing I knew, the entire cookbook wherein the recipe was to be found arrived at my doorstep. Isn’t social media great?!

The Glory of Southern Cooking by James Villas (former food and wine editor of Town & Country magazine and James Beard Award winning food writer) was published several years ago but was just re-released in paperback this September. As is to be expected, this cook contains classic recipes for fried chicken, biscuits and peach cobbler, but it also has a ton of recipes that have managed to avail a yankee like me, including chilled peach and mango soup, curried orange chicken and Ramos gin fizz (with pasteurized egg whites and orange flower water!). Click HERE to purchase your copy.

I usually eat my grits boiled in water and combined with Parmesan cheese, alongside my morning eggs. But these grits are unbelievably decadent, addictive and delicious, and I am actually considering serving them on Thanksgiving. Here’s the recipe:

(Yield: 6-8 servings)

2 cups water

1 1/2 cups milk

1 teaspoon salt

1 cup quick-cooking grits

9 tablespooons (1 stick plus 1 tablespoon) butter

2 scallions (white parts only), thinly sliced

1/4 teaspoon garlic powder

2 1/2 cups shredded sharp cheddar cheese

One 10-ounce can diced tomatoes and green chiles, drained

Preheat oven to 350 degrees F.

In a large saucepan, combine the water, milk and salt and bring to a boil. Gradually add the grits and stir constantly for 1 minute. Reduce the heat to moderately low, cover, and cook for 3 minutes. Add 8 tablespoons of the butter, still till melted, cover, and cook till the grits are thick and creamy, about 4 minutes. Remove the pan from the heat.

In a small skillet, melt the remaining 1 tablespoon of butter over moderate heat, add the scallions, and stir till softened, about 1 minute. Add the scallions to the grits along with the garlic powder and 1 1/2 cups of the cheese and stir till the cheese melts. Add the tomatoes and chiles, stir till well blended, scrape the mixture into a shallow buttered 2-quart baking dish, and bake for 30 minutes. Sprinkle the remaining cheese over the top and continue baking till golden, about 10 minutes. Serve hot.

Guest post by Curious Cuisiniere: Recipe for cornbread sausage stuffing

Fellow food blogger Sarah, the Curious Cuisiniere (we both have a French word in our blog names!), suggested that we guest post for each other and of course I said yes. We decided to swap Thanksgiving recipes. Below is her creation. Isn’t it beautiful? Click HERE to see Sarah’s blog and follow her!

One of my top five Thanksgiving foods is definitely the stuffing. Over here, we’re used to the classic white bread and cracker herbed stuffing. Which is great, don’t get me wrong, but I had seen recipes for cornbread stuffing floating around and I was really intrigued.

You see, stuffing is all about texture. Too mushy, and it can be gross. Too dry, and you just have breadcrumbs. With its grainy texture, how would adding cornbread effect the stuffing? It was a question I just had to answer. And I sure am glad I did.

Seriously. We devoured the whole pan of this in two days. Just the two of us.

This stuffing is part white bread, part cornbread. The white bread does a nice job holding the stuffing together and adds familiarity, while the cornbread gives incredible texture and flavor to the dish. I wanted to play off the sweet corn flavor by using sweeter, more mild veggies. Leeks give a soft hint of onion, carrots add a nice vegetable fullness, and celery brings in the flavors of a classic stuffing.

If you like stuffing, you’ve got to try this. If you hate stuffing because it’s too mushy, you’ve got to try this too. But carefully – you just might become a stuffing convert.

Cornbread Sausage Stuffing

Yield (1) 8×8 baking dish (roughly 2 qts) (enough to stuff a 10-12lb bird)

Ingredients

1/2 lb Sweet Italian Turkey Sausage (2 sausages), casing removed (You could use a regular Sweet Italian here, just be sure to drain the fat after cooking it)
3/4 c leek, diced
1/2 c carrot, diced very fine or minced
1/2 c celery, diced
4 c cornbread, prepared, left out to dry slightly, and crumbled into 1/2″ chunks
3 c white bread cubes (1/2″), left out out dry slightly
1 tsp thyme
1/2 tsp sage
1/4 tsp salt
1/4 tsp pepper
2 1/2 c vegetable stock
1 egg, beaten

Directions

1. Preheat oven to 350F.

2. In a non-stick frying pan, fry up your sausages, breaking the meat into chunks. Remove cooked sausage from pan.

3. In the same pan, saute leeks, carrots, and celery until tender. Remove from heat and combine with sausage.

4. In a large bowl, mix cornbread pieces, bread cubes, and spices. Toss to combine.

5. Add sausage and vegetable mixture. Mix to combine.

6. Add vegetable stock 1/2 c at a time, stirring to coat the bread. Continue adding vegetable stock until the bread mixture is moist. (There will be a notable point where the bread goes from soaking up all the stock to the stock pooling in the bottom. Don’t worry if there is a little stock pooling in the bowl.)

7. Mix in the beaten egg.

(If you are stuffing your bird, do so now. Stuffing can be made ahead of time up to this point and refrigerated until you are ready to cook your bird. It is best to stuff the bird right before it goes into the oven. )

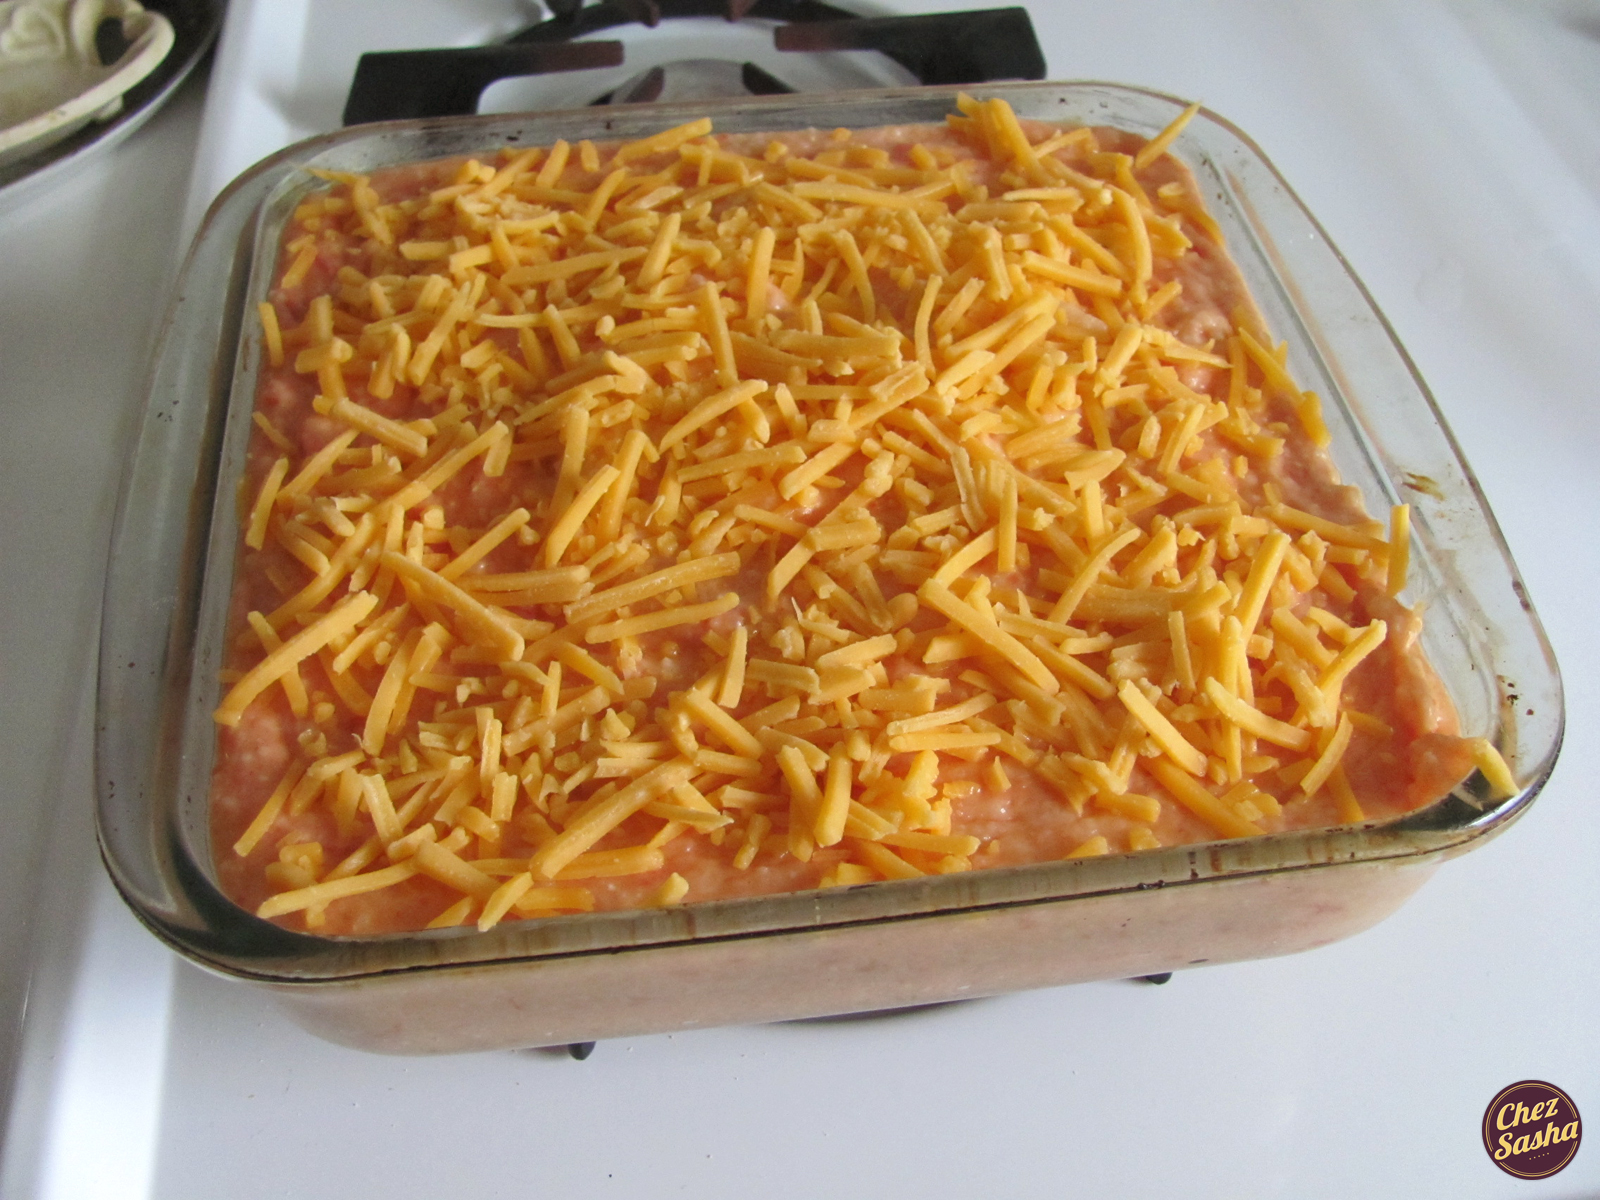
8. Grease an 8×8 (or other 2qt) baking dish. Fill the dish with the stuffing and bake, uncovered, at 350F for 30 minutes. (Check the stuffing after 20 minutes to be sure the top isn’t browning too much. If it is, top with aluminum foil for the remainder of the baking time.) Stuffing is done when a metal knife inserted in the center comes out hot.

Vegetable pancakes

I am currently in the last semester of my undergraduate education, and with each day, I care about schoolwork less and less. Some of you are probably thinking, “Oh no! But school is so important.” While I agree, I also believe that tending to that which makes one’s heart smile is equally as important (unless it’s killing babies/cooking drugs, in which case one should seek help). That is why on the first day of my Sandy “staycation”, I was ecstatic - no school, no work, can’t go outside, nothing to do but make love to my kitchen. Seriously, at this point, all I want to do is explore new recipes, work on my photography, choose my words, and hit “Publish”.

These pancakes are just one of the scrumptious things I made that day.

This is another one of my mom’s recipes. The outside crisps up while the inside stays delicate and soft - topped with cold sour cream, these little guys kick ass. Warning: next day fridge leftovers will not be good so I urge you to eat these fast, with which I don’t foresee you having a problem.

(Yield: about 20 little pancakes)

Ingredients:

2 medium russet potatoes, peeled

1 green squash, peeled

1 large carrot, peeled

2 garlic cloves, minced

2 eggs, beaten

1/2 c all-purpose flour

Salt + freshly ground black pepper

Vegetable oil for frying

Sour cream for serving

Procedure: Shred vegetables (preferably using a food processor).

Working with a handful of vegetables at a time, squeeze out as much liquid from vegetables as possible with your hands. Then combine vegetables with garlic, eggs and flour in a bowl. Season with 3/4 tsp salt and 1/2 tsp pepper.

Heat a skillet/griddle pan over medium heat and add enough oil to cover the bottom. When hot, spoon batter onto skillet and press down on each pancake with spoon to flatten. Pancakes should be 2-3″ in diameter.

Cook about 4 min per side, flipping once, until golden brown. Drain on paper towels. Repeat with remaining batter. Serve immediately, topped with sour cream.

What would you be doing if you didn’t have to study/work?

Crispy breaded cauliflower

Cauliflower is a hard vegetable to like, because let’s face it – it smells kind of funky. But, it’s very low in calories while being a great source of B-group vitamins, vitamin K, and one serving of it provides almost the full daily recommended dose of vitamin C. Cauliflower is a super food and if seasoned and cooked properly, it can be quite tasty and a nice addition into a boring vegetable repertoire. So learn to like it.

We have my mom to thank for this recipe.

(Yield: 6-8 servings)

Ingredients:

1 head of cauliflower

2 eggs

1/3 tsp salt + 1/3 tsp pepper

3/4 tsp garlic powder

About 1 c seasoned bread crumbs

Olive oil for frying

Grated Parmesan cheese and chopped parsley for garnish

Procedure: Trim cauliflower and slice into about ½”-thick pieces (there will be some odd-shaped pieces as well but they can come too!) Beat eggs with salt, pepper and garlic in a shallow dish and add cauliflower. Toss until coated evenly. Heat a large skillet over medium heat and add just enough oil to cover the bottom. Dredge cauliflower in bread crumbs and place into skillet. It should sizzle gently – if it is not, the oil is not hot enough yet. Cook 3-4 min per side, until golden brown, flipping once. Using tongs, transfer cooked cauliflower to platter covered with paper towels to drain. Sprinkle with cheese while hot, garnish with parsley just before serving. Cauliflower will need to be cooked in several batches.

How do you like to cook cauliflower?

Pan-fried Brussels sprouts

During a recent visit to the doctor, I was given a strange and unprecedented diagnosis that requires me to watch my diet for the next week or so. Basically, I was advised to avoid caffeine, chocolate, carbs, citrus, and tomatoes - oh, the horror! Between you and me, I believe I was misdiagnosed, but just in case I wasn’t, I’ll follow the doctor’s orders. As difficult as it is to avoid all the aforementioned items, health always comes first.

In light of this diagnosis, I decided to venture out into the world of unknown to me vegetables. I’ve eaten Brussels sprouts before but never cooked them at home. These mini cabbages are very high in Vitamin C and are in fact quite popular in Brussels. Also, it is said that they retain most of their nutrients whist roasting or sauteing, but lose them if boiled.

Note: Brussels sprouts are bitter when raw and when overcooked - make sure to taste them throughout the cooking process and turn the heat off at the right time. You will know when they are perfectly cooked when the inside is a little mushy and the outside is still crunchy.

(Yield: 4 servings)

Ingredients:

1 lb Brussels sprouts

2 tbsp olive oil

2 garlic cloves, crushed

1 tsp paprika

1/3 tsp yellow curry powder

Salt

Procedure: Rinse and drain sprouts. Trim white ends and peel off dark green outside leaves. Slice in half lengthwise. Place large skillet over medium heat and add olive oil. Add garlic, cook for 30 secs, and add sprouts. Season with paprika, curry and salt. Stir and allow to caramelize. Cook for about 12 min, stirring occasionally. Serve hot.

Sesame Peanut Noodles

I’m feeling under the weather today so this is going to be short and to the point - the witty banter is on hold until Friday’s post.

Remember my honey-lime grilled chicken w/ cucumber salsa post from last week? Well, the side dish photographed alongside that chicken were these noodles.

(Yield: 4 servings)

Ingredients:

1 lb fresh, store-bought Asian-style noodles (shape of your choice)

1 tbsp salt

1 heaping tbsp smooth peanut butter

1 tbsp sesame oil

2 tbsp low-sodium soy sauce

Sriracha, to taste

Sesame seeds for garnish

Procedure: Bring a large pot of water to a boil. Add salt. Boil noodles in water, stirring frequently, until they float to the top and are fully cooked - about 3 min. Drain and return to hot pot. Stir in PB, oil, soy sauce and sriracha. Taste and re-season if necessary. Garnish with seeds. May be served hot or at room temperature.

Pan-fried plantains w/ kick-ass sour cream dip

Latin-American cuisine is not something I cook a lot of at home. I am not quite sure why since it is one of my favorites, but ever since these tequitos and now these ah-mazing platanos, I hope my patterns are changing.

I tweeted about how excited I was to finally cook this exotic fruit and my e-friend Olga - from one of my favorite food blogs, Mango & Tomato - tweeted back and helped me figure out how it’s done. Thanks, gurrl!

You’re probably wondering just what is so kick-ass about this dip but I am not going to tell you. I guess you’ll just have to make it and taste for yourself…

Ingredients:

2 very ripe plantains

2 tbsp olive oil

2 tbsp butter

Salt

“Kick-ass dip”:

3 tbsp sour cream

1/2-1 tsp sriracha sauce (to taste)

1 tbsp lime juice

1/2 tsp lime zest

1 small garlic clove, crushed

Procedure: Cut off about 1″ of both ends of plantains. Peel and slice on a diagonal into 1/2″-thick slices. Place skillet over medium heat and add oil and butter. When oil is hot, add about half of slices into oil and cook 2-3 min per side, until golden brown. Remove and drain on paper towels. Sprinkle with salt while plantains are still very hot. Fry the second batch and repeat procedure. Serve warm.

To make dip, simply stir together all ingredients in a bowl. Taste and adjust seasonings if necessary.

This dip would also pair fabulously with crudités (that’s raw vegetables to you un-cultured Americans) or tortilla chips.

In other news, I will be spending next week camping in Cape Cod. The thought of going an entire week sans manicure kind of gives me the shakes, but I am pretty excited for the change of scenery and the much, much needed relaxation. While there, I plan to visit Provincetown so I was wondering if you guys had any suggestions as to where I should eat/drink while there? Any and all suggestions will be greatly appreciated!

Gnocchi au Gratin

First, let’s get this out of the way:

  • It’s pronounced “nnn-yo-key oh gra-tan”
  • Gnocchi - Italian potato dumplings
  • Au gratin - French for “baked in a creamy sauce to crusty perfection”

This dish was inspired by my beloved Bon Appetit magazine - this recipe to be exact. Although the photos look sort of similar, the recipes are nothing alike. BA’s recipe calls for homemade gnocchi baked in a rosemary-infused heavy cream and studded with Gorgonzola Dolce cheese. I thought I could outsmart the magazine - silly me - by making a cheese sauce instead. The flavors all turned out right but the dish turned out much less creamy than I’d anticipated. I think this was because the gnocchi were really starchy.

Oh well. Not all recipes are perfect. And, I’m still learning :)

Although this recipe (in my opinion) didn’t work as a casserole, the dumplings and sauce may well work together if not baked. If anyone tests the idea out, please let me know how it goes! Also, this sauce works perfectly as the latter ingredient of mac & cheese - baked or not.

(Yield: 4 servings)

Ingredients:

1 package store bought frozen gnocchi

1 1/2 tbsp butter

1 heaping tbsp all-purpose flour

1 c whole milk

1 pinch ground nutmeg

1 c grated Gouda cheese

Salt/freshly ground black pepper

Procedure for sauce: Melt butter over low heat in a small saucepan. Whisk in flour. Whisk until combined and bubbling, about 60-90 seconds. Whisk in milk, raise heat to medium-low and bring to a simmer, whisking frequently. Season with nutmeg and generous pinches of salt and pepper. Simmer sauce, continuing to whisk frequently, until it has thickened. Add cheese, turn heat off, and whisk until melted.

And then…: Preheat oven to 375F. Cook gnocchi in salted boiling water for 10-12 min, until they have all floated to the top and recommenced simmering (or according to package directions). Drain, combine with sauce, transfer to a baking dish and cook for 25-30 min, until the top is golden brown. Remove from oven. Serve immediately.

Making love to rice.

Unless it has been gently enveloped in the loving arms of wine, broth, Parmesan cheese and butter - as in risotto- or expertly stir-fried with soy sauce, eggs and vegetables, rice may seem a little boring, like a lifelong lover whose tricks are well-known and predictable. Yet having had it time and time again, it is not something you would ever dream of giving up. And you probably think you know how to treat this starchy stuff, but let’s just make sure. Here are some steps you should be following to ensure a pleasant outcome every time:

  • Strictly adhere to “the 2-to-1 rule” - 2 parts liquid to 1 part rice
  • Use chicken, beef or vegetable broth instead of water
  • Toast rice in fat (butter, oil, animal fat) before adding liquid
  • Do not stir rice after liquid was added
  • Incorporate as much flavor as possible

And here is a simple recipe to un-bore your rice.

(Yield: 4 servings)

Ingredients:

2 tbsp olive oil

1 small yellow onion, diced

1 garlic clove, minced

1 c white rice

1 heaping tsp yellow curry powder

1 pinch saffron strands (soaked in 1 tsp of vodka 10 min prior to use)*

2 c low-sodium chicken broth, boiling hot

Salt

Chopped scallion for garnish

*Some internet research and private experimentation reveal that this trick helps the saffron release its most intense orange color. Do not drain the vodka - add it to the pan along with saffron.

Procedure: Place small pan on medium-low heat. Add oil, onion and garlic with a pinch of salt. Stir and cook until translucent, about 4 min. Add rice and toast for about 1 min, stirring constantly. Then stir in curry and saffron; when combined, add broth and close tightly with lid. Cook for about 12 min, or until liquid is almost absorbed. Raise heat to medium and cook for 1 min. Then turn heat off and keep lid closed for another 5 min (to let the rice finish cooking in steam). Fluff with fork and garnish with scallion right before serving.

P.S: If you are the type to keep boxes of mass-produced, over-salted stuff labeled “Arroz Amarillo” or something of the like in your home, give this recipe a try before stocking up on your next batch.