Creamy avocado dip

In many of our lives (mine included), avocados only make an appearance in the form of guacamole, or amongst layers of meat, cheese and lettuce in a sandwich. This isn’t fair. There is no reason why this healthy and sinfully good fruit should not get to lead as exciting a life as its distant fruit cousins.

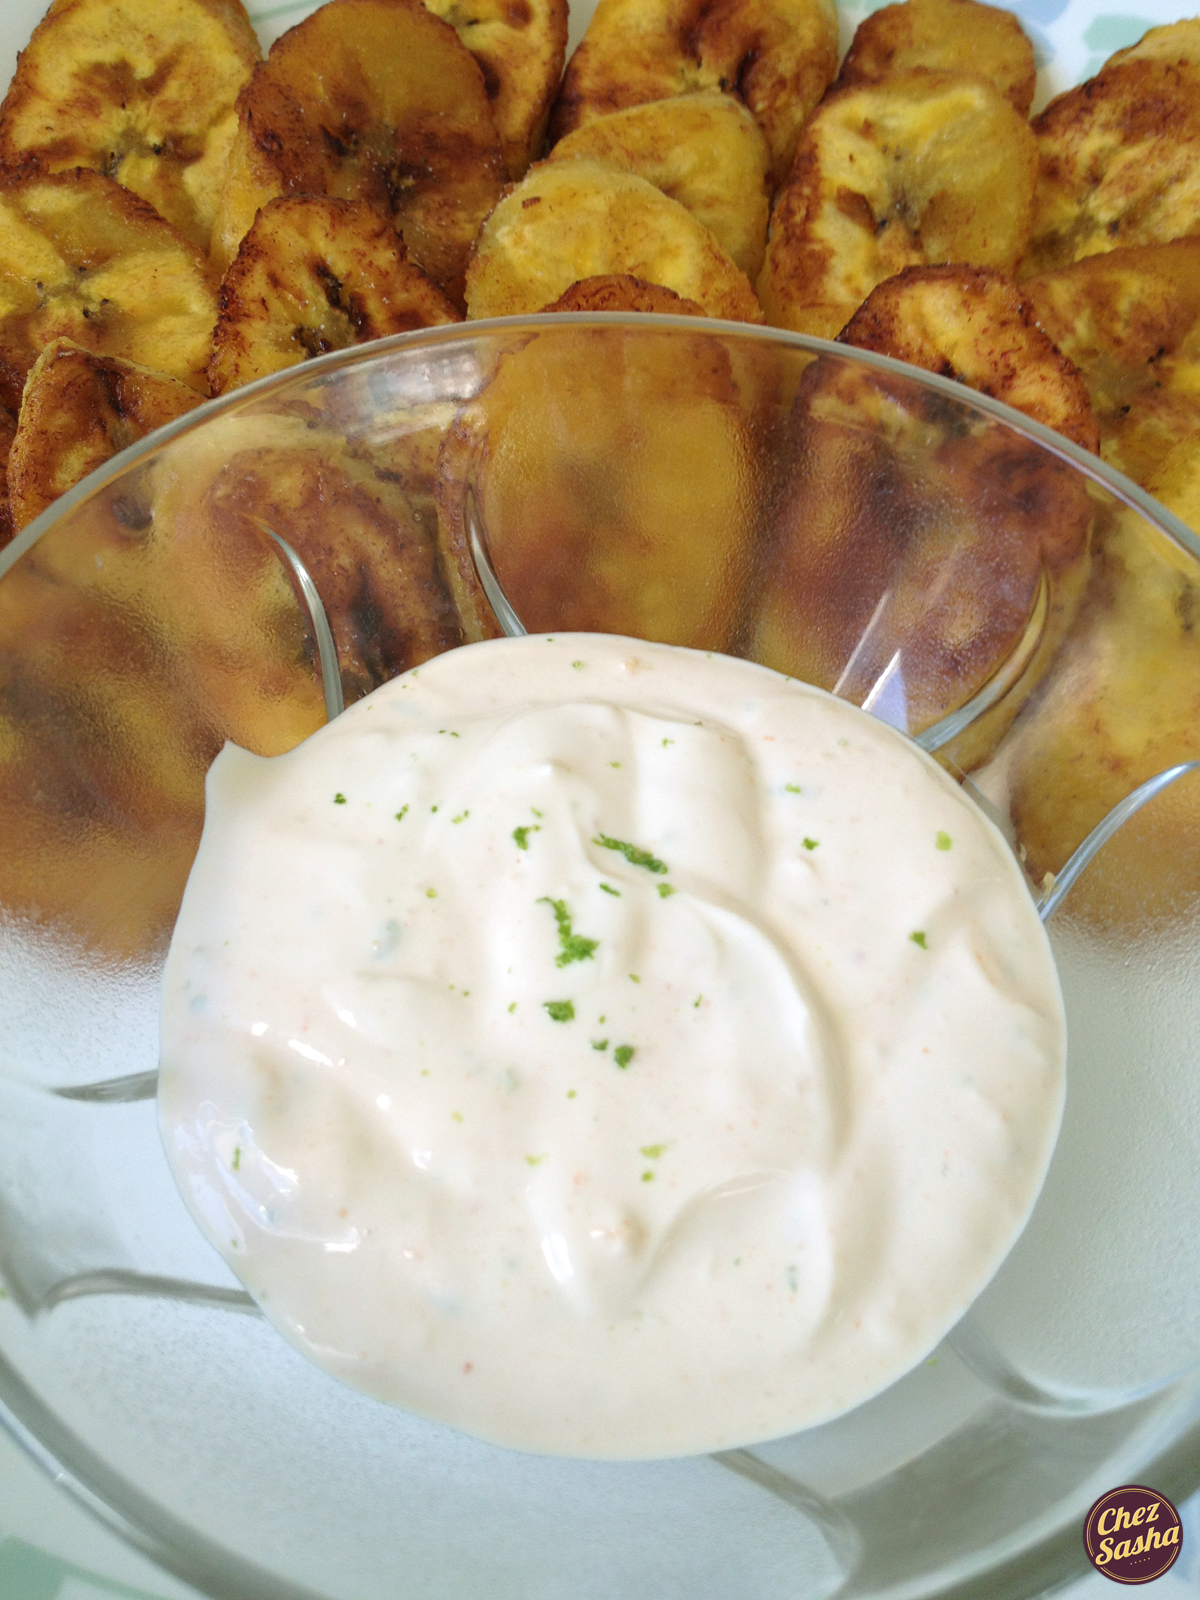
Here’s how this dip came to be: I was in the midst of making baked coconut shrimp for the fist time and wanted to make a dipping sauce for them, not unlike this kick-ass sour cream dip for fried plantains. Then I spotted an avocado at the bottom on my fridge. It looked so sad and lonesome that I couldn’t help but grab it by the hand and say, “Come along, friend!” (Hypothetically, of course). The ingredients for this dip ended up haphazardly on my counter and I just thought, “This may work.” And it did. Clearly, it’s not that different from guacamole, but it is a small step for avocado-kind.

What happened to the shrimp, you ask? Well, I didn’t adhere to any specific recipe (as I am, unfortunately, all too prone to doing) and although they turned out very tasty, they were also kind of ugly, so I will not share that recipe with you as of yet. For more information on avocados - nutrition, storage and dissection - watch my video!

Dip may be served with: crispy shrimp or other seafood, tortilla chips, chicken tenders, crudites.

(Yield: about 1 cup)

Ingredients:

1 ripe avocado

1 tbsp lemon juice

3 tbsp sour cream

1/2-1 tsp sriracha sauce, to taste

1 tbsp chopped cilantro

Salt, to taste

Procedure: Dice avocado, place into a bowl and mash with a fork along with lemon juice until pureed. Stir in remaining ingredients. Taste and re-season if necessary. Serve immediately.

Homemade honey mustard dressing

I hate salads but force myself to eat them since they’re like healthy and all that jazz. And I know that if I make the effort to make this dressing ahead of time and keep a container of it in my fridge, I’ll be more likely to do the forcing.

Dig my Soviet garlic crusher manufactured circa 1920?

And you may recall my feelings on store-bought dressing from this post.

(Yield: About 1/2 c)

Ingredients:

3 tbsp fresh lemon juice

1 tbsp brown mustard

1 heaping tbsp honey

1 small garlic clove, crushed

Pinch of salt and freshly ground black pepper

About 6 tbsp extra virgin olive oil

Procedure: Whisk together all ingredients except oil in a bowl. Then add oil in a steady stream while continually whisking. The final product should be homogenous; or as fancy food people say, emulsified. Taste and re-season if necessary. If not using immediately, store in an airtight container in the fridge for up to ten days.

Homemade blue cheese dressing

I never buy bottled salad dressing. Ever. The ingredient labels tend to have a whole list of words that I can’t pronounce and that makes me cringe. Of course the same goes for many of the foods I eat everyday but I think what sets salad dressing apart is that it will eventually grace my romaine leaves, broccoli flourets and avocado cubes, which are meant to be super nutritious. But what good will that nutrition do if I drench in what I feel is most easily described as plastic?

The base of this dressing is buttermilk, which only has 120 calories per cup and a whole 9 g’s of protein. And although the cheese is high in fat, it also has 6 g’s of protein per serving.

(Yield: About 1 c of dressing)

Ingredients:

1/2 c crumbled blue cheese

1/3 c buttermilk

1 tbsp sour cream

1 tbsp mayo

1 tbsp white vinegar

1/2 tsp garlic powder

Salt and freshly ground black pepper

Procedure: Combine all ingredients in a bowl and whisk together. Season to taste with salt and pepper. Store in airtight container in fridge for up to one week.

What’s your favorite dressing recipe?

Breakfast blini w/ peach sauce

It seems like every time I come across a blini recipe, they are served with crème fraîche, smoked salmon and/or caviar. I don’t know what Soviet Union those cooks are from, but as far as I’m concerned, our blini were rarely graced with such lavish toppings. Caviar was a cherished ingredient reserved for birthdays and national holidays that was served atop heavily buttered fresh bread. Blini* are a breakfast food that most prefer to eat with sour cream, jam, or honey.

*Blini: Russian for pancakes, plural; Blin: singular. In my house, we call these blinchiki [bleen-cheeky], which means little pancakes.

If you are a devout reader of this blog, you are no stranger to my love of fresh fruit sauces - as in these strawberry and blueberry varieties. Now I can add peach to this list.

(Yield: 4 servings)

Ingredients:

6 oz buttermilk

1/2 tsp baking soda

1 egg

1 tsp granulated sugar

1/2 tsp vanilla extract

1/2 c - 1 c all-purpose flour

Vegetable oil

Procedure: In a cup, stir together buttermilk and baking soda. Let stand for about 2 min. In a large bowl, lightly beat egg. Then whisk in buttermilk, sugar and vanilla. When combined, add flour - my mom never measures the amount of flour so nor do I. Start by adding 1/2 c and gently whisk. The final batter should be the consistency of a thick smoothie, so add more flour as needed. Then heat a griddle/skillet over medium heat and add enough oil to cover the bottom. Using a small ladle, pour about a tablespoon’s worth of batter onto griddle, spacing blini at least 1/2″ apart. (If blini start to curl up and sizzle around the edges right away, the batter is too thin). Cook about 3 min per side, flipping once. Drain on paper towels. Repeat with remaining batter. Serve hot.

Sauce:

1 medium size peach, finely diced

2 tbsp water

1 tbsp lemon juice

3/4 tsp corn starch

1 tsp sugar (may vary according to fruit’s natural sweetness)

Procedure for sauce: Stir together all ingredients in a small saucepan. Heat over medium heat. When mixture starts to bubble, turn heat down to low and cook until fruit softens and syrup forms, about 5 min. Serve hot.

Disclaimer: The day I made this batch and took these photos, I miscalculated the recipe a tad. I diligently went over it with the expert - my mom - and we tracked down the problem. The recipe above is the final edited version. However, the proper recipe will yield blini that are puffier than the ones photographed here.

Honey lime grilled chicken w/ cucumber salsa

The idea for this salsa came from the June 2012 issue of Bon Appetit magazine. It was a featured recipe from a restaurant called Citizen Public House in Scottsdale, AZ, as a suggested garnish for seared tuna. But, since I’m always looking for new ways to dress up grilled chicken, I decided to do this instead.

Since the chicken was lightly coated in honey, it caramelized and charred quite nicely, which made it the ideal canvas for the tangy, fresh salsa.

(Yield: 4 servings)

Ingredients:

1 lb boneless skinless chicken cutlets

1 heaping tbsp honey

2-3 tbsp fresh lime juice

Sriracha, to taste

3/4 tsp salt + 1/2 tsp black pepper

Procedure for chicken: Whisk together marinade in tupperware dish. Wash and dry chicken and place in dish. Massage chicken with marinade until it is evenly coated. Close and place in refrigerator - marinate for at least one hour, or up to six. Then, grease a grill pan with oil or spray and place on high heat. Place cutlets on grill and cook for 2 min. Rotate 45 degrees and cook for another 2 min. Then, turn over and repeat (this cooking time is for cutlets of about 1/3″-thickness). Take off grill and let stand for 10 minutes before slicing.

Salsa (adapted from this recipe):

2 peeled, finely diced medium cucumbers (about 2 c)

2 tbsp finely diced red onion

2 tbsp chopped cilantro

2 tbsp fresh lime juice

Fleur de sel to taste (or the regular ol’ iodized kind)

Procedure for salsa: Combine all ingredients. Use as garnish for seared meat/fish of your choice.

I know you’re probably dying to know the recipe for those delicious looking noodles too, but you’ll have to wait for a later post to find out!

Pan-fried plantains w/ kick-ass sour cream dip

Latin-American cuisine is not something I cook a lot of at home. I am not quite sure why since it is one of my favorites, but ever since these tequitos and now these ah-mazing platanos, I hope my patterns are changing.

I tweeted about how excited I was to finally cook this exotic fruit and my e-friend Olga - from one of my favorite food blogs, Mango & Tomato - tweeted back and helped me figure out how it’s done. Thanks, gurrl!

You’re probably wondering just what is so kick-ass about this dip but I am not going to tell you. I guess you’ll just have to make it and taste for yourself…

Ingredients:

2 very ripe plantains

2 tbsp olive oil

2 tbsp butter

Salt

“Kick-ass dip”:

3 tbsp sour cream

1/2-1 tsp sriracha sauce (to taste)

1 tbsp lime juice

1/2 tsp lime zest

1 small garlic clove, crushed

Procedure: Cut off about 1″ of both ends of plantains. Peel and slice on a diagonal into 1/2″-thick slices. Place skillet over medium heat and add oil and butter. When oil is hot, add about half of slices into oil and cook 2-3 min per side, until golden brown. Remove and drain on paper towels. Sprinkle with salt while plantains are still very hot. Fry the second batch and repeat procedure. Serve warm.

To make dip, simply stir together all ingredients in a bowl. Taste and adjust seasonings if necessary.

This dip would also pair fabulously with crudités (that’s raw vegetables to you un-cultured Americans) or tortilla chips.

In other news, I will be spending next week camping in Cape Cod. The thought of going an entire week sans manicure kind of gives me the shakes, but I am pretty excited for the change of scenery and the much, much needed relaxation. While there, I plan to visit Provincetown so I was wondering if you guys had any suggestions as to where I should eat/drink while there? Any and all suggestions will be greatly appreciated!

The easiest strawberry sauce ever.

This sauce is quick and easy to make, and perfect for this time of year because berries are finally in season. Sure, you can buy a jarred sauce in the supermarket, but I assure you that my version is superior. I guarantee your satisfaction. Try it risk-free, and if you’re not happy, I’ll give you your money back! (Just kidding – No, I won’t).

I’ve posted a similar recipe in the past, but this one is a bit more advanced and far more delicious – it’s the vanilla that makes all the difference. This sauce may also be served on waffles, French toast, ice cream, sirniki, blini, crepes, and just about anything else you can imagine.

(Yield: about 2 servings)

Ingredients:

1 c /about 8 large strawberries, finely chopped

1 tbsp water

1 tbsp lemon juice

¾ tsp corn starch

1 tsp vanilla extract

1 tbsp granulated sugar (may vary according to sweetness of fruit)

Procedure: Stir together all ingredients in a small saucepan. Place over medium heat and bring to a simmer. Lower heat and simmer until sauce has thickened. Taste and add sugar if necessary. Turn heat off.

Gnocchi au Gratin

First, let’s get this out of the way:

  • It’s pronounced “nnn-yo-key oh gra-tan”
  • Gnocchi - Italian potato dumplings
  • Au gratin - French for “baked in a creamy sauce to crusty perfection”

This dish was inspired by my beloved Bon Appetit magazine - this recipe to be exact. Although the photos look sort of similar, the recipes are nothing alike. BA’s recipe calls for homemade gnocchi baked in a rosemary-infused heavy cream and studded with Gorgonzola Dolce cheese. I thought I could outsmart the magazine - silly me - by making a cheese sauce instead. The flavors all turned out right but the dish turned out much less creamy than I’d anticipated. I think this was because the gnocchi were really starchy.

Oh well. Not all recipes are perfect. And, I’m still learning :)

Although this recipe (in my opinion) didn’t work as a casserole, the dumplings and sauce may well work together if not baked. If anyone tests the idea out, please let me know how it goes! Also, this sauce works perfectly as the latter ingredient of mac & cheese - baked or not.

(Yield: 4 servings)

Ingredients:

1 package store bought frozen gnocchi

1 1/2 tbsp butter

1 heaping tbsp all-purpose flour

1 c whole milk

1 pinch ground nutmeg

1 c grated Gouda cheese

Salt/freshly ground black pepper

Procedure for sauce: Melt butter over low heat in a small saucepan. Whisk in flour. Whisk until combined and bubbling, about 60-90 seconds. Whisk in milk, raise heat to medium-low and bring to a simmer, whisking frequently. Season with nutmeg and generous pinches of salt and pepper. Simmer sauce, continuing to whisk frequently, until it has thickened. Add cheese, turn heat off, and whisk until melted.

And then…: Preheat oven to 375F. Cook gnocchi in salted boiling water for 10-12 min, until they have all floated to the top and recommenced simmering (or according to package directions). Drain, combine with sauce, transfer to a baking dish and cook for 25-30 min, until the top is golden brown. Remove from oven. Serve immediately.

Skillet-fried chicken w/ sriracha mayo

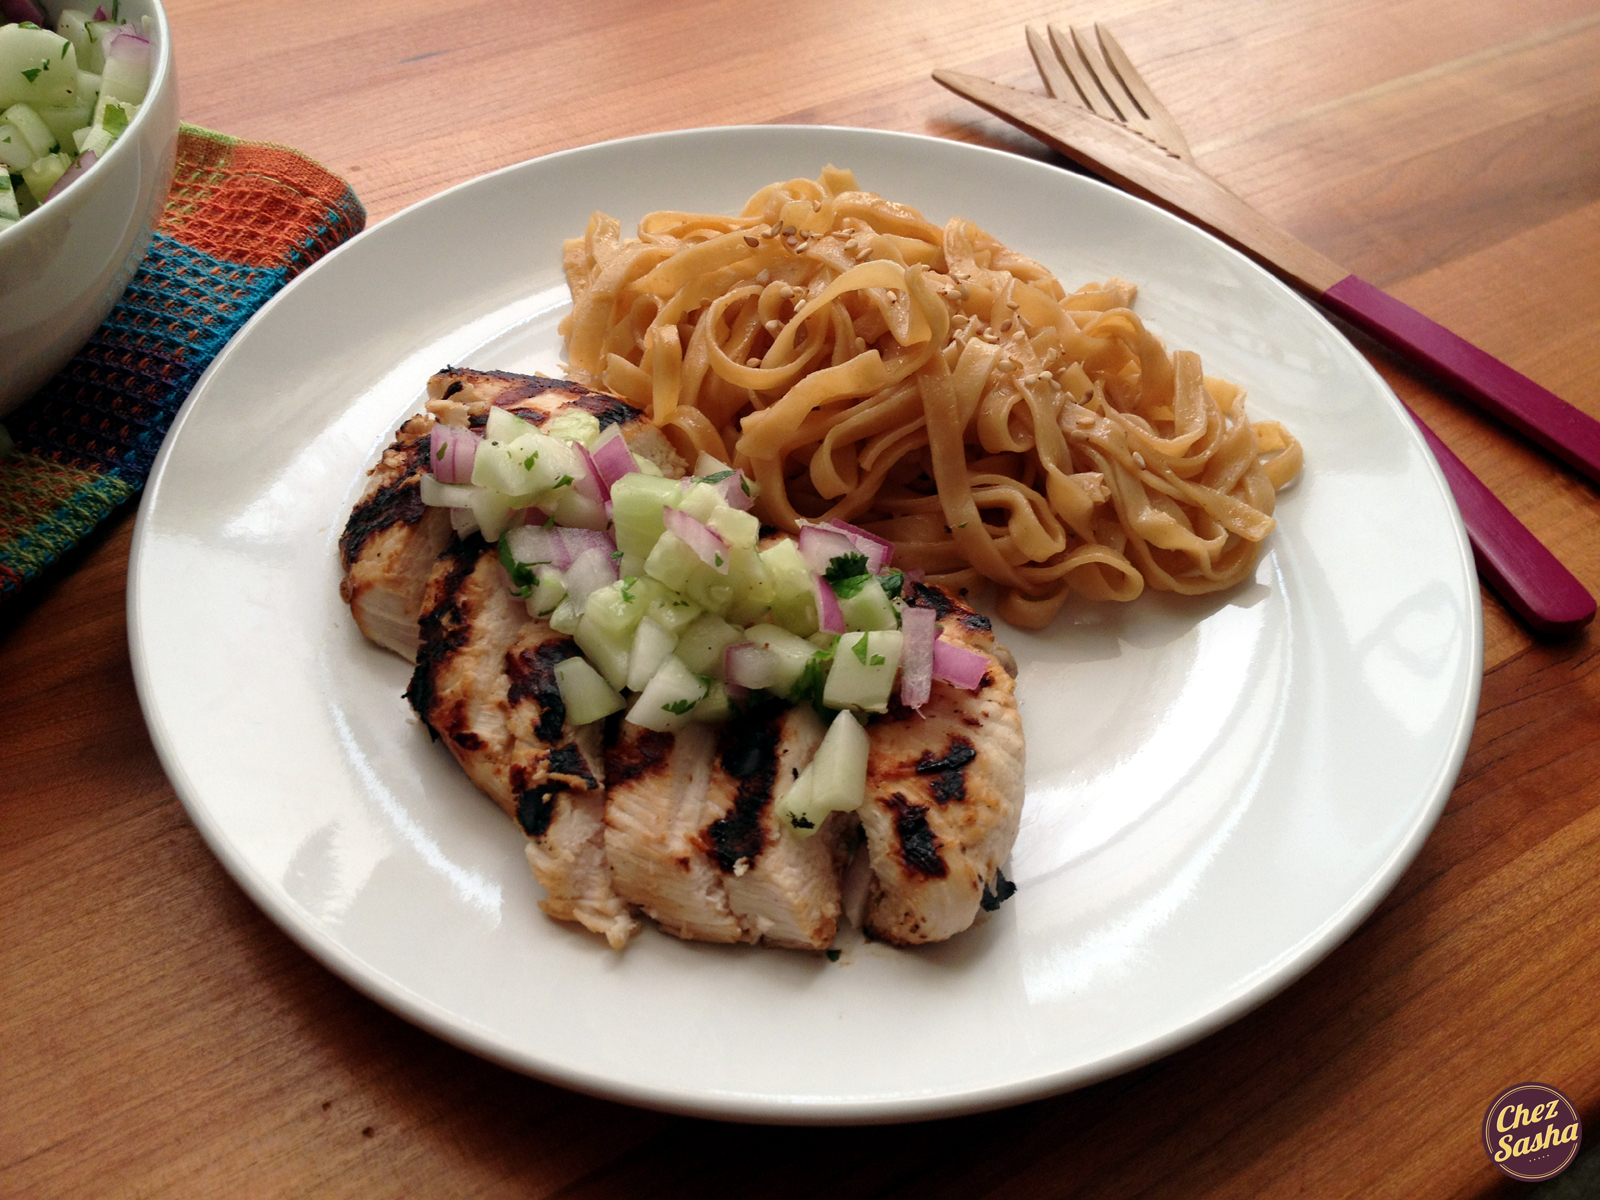
As soon as I found the February issue of Bon Appetit in my mailbox, I knew I’d absolutely have to cook the cover. Just look at how gracefully this crispy, golden drumstick floats over the white background – it just… says so much by saying so little.

Click photo for full recipe

I’d made this chicken at my friend’s house twice (except that we skipped the marinating overnight step) and it was a great success. The chicken was as crispy and lovely as promised by the minimalist magazine cover.

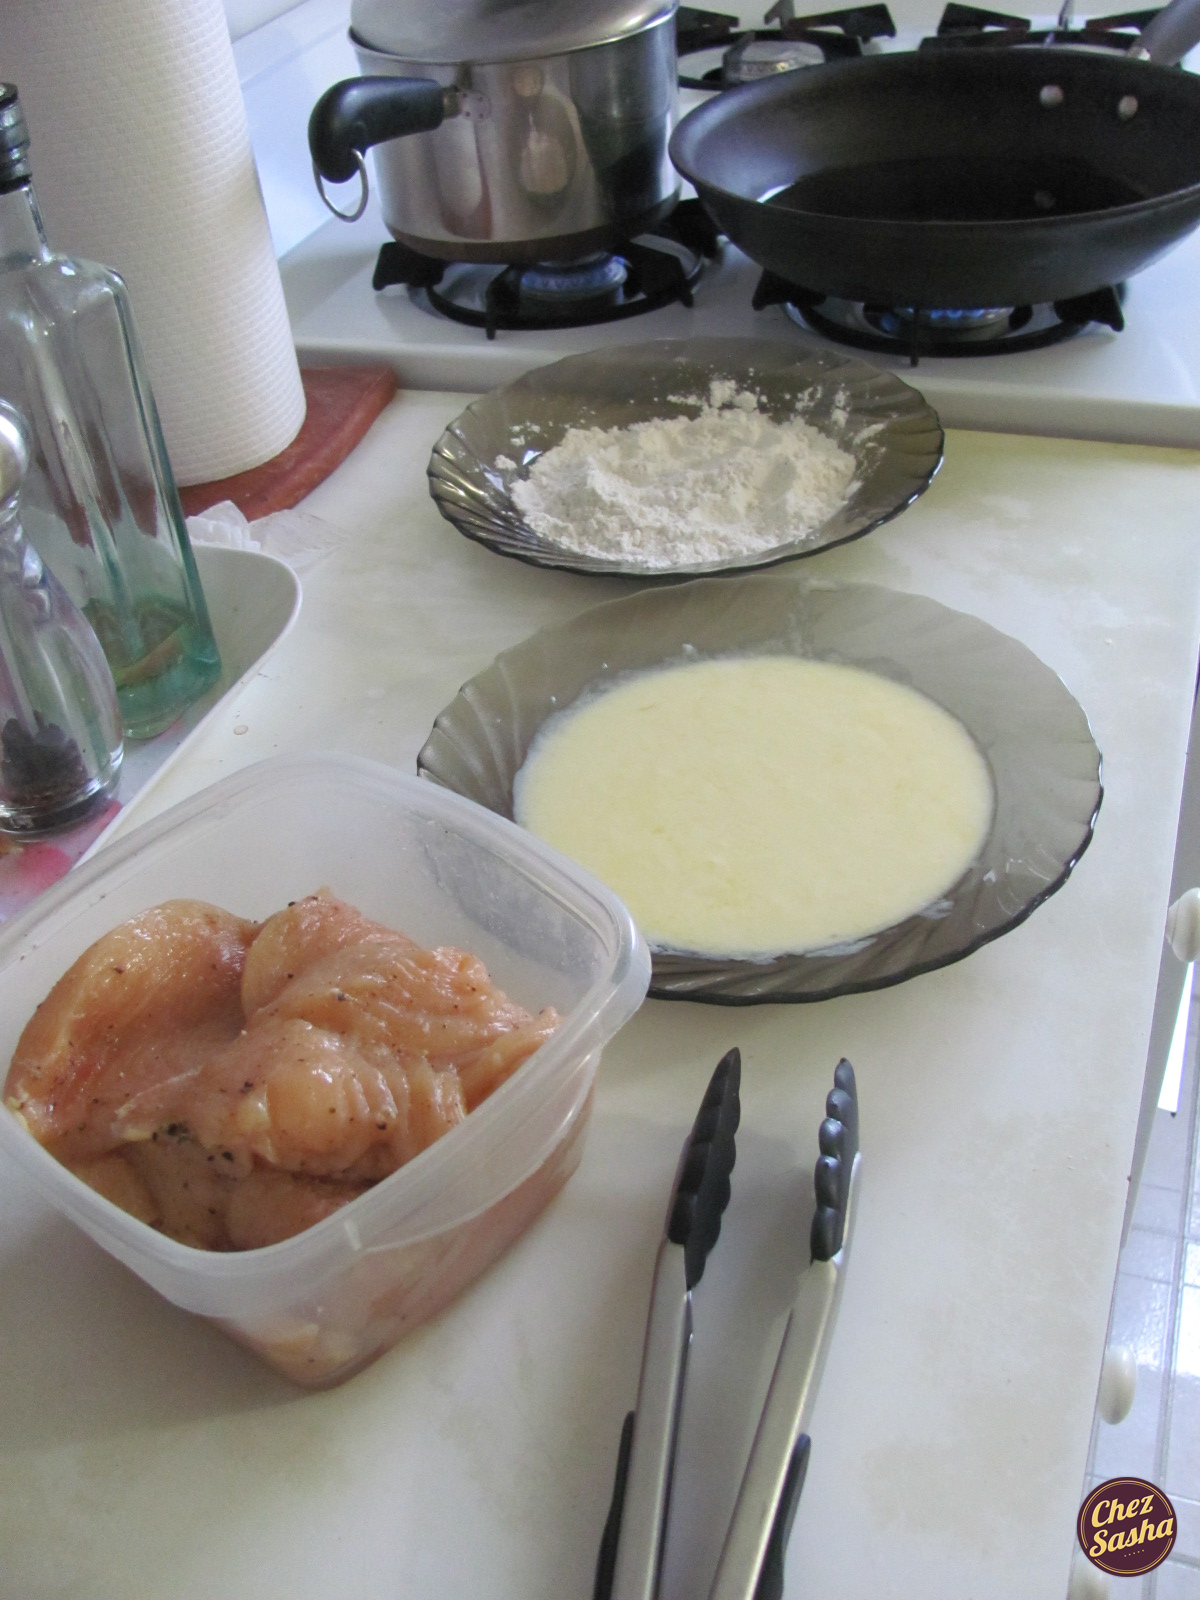
Then I decided to make it again, at home this time, using skinless, boneless chicken breasts. The results were moist and delicious but not nearly as crispy as when I had used drumsticks, which can probably be attributed to the lack of the fatty skin. Also, I can’t remember whether or not I used an egg in the batter when I cooked the chicken over my friend’s house.

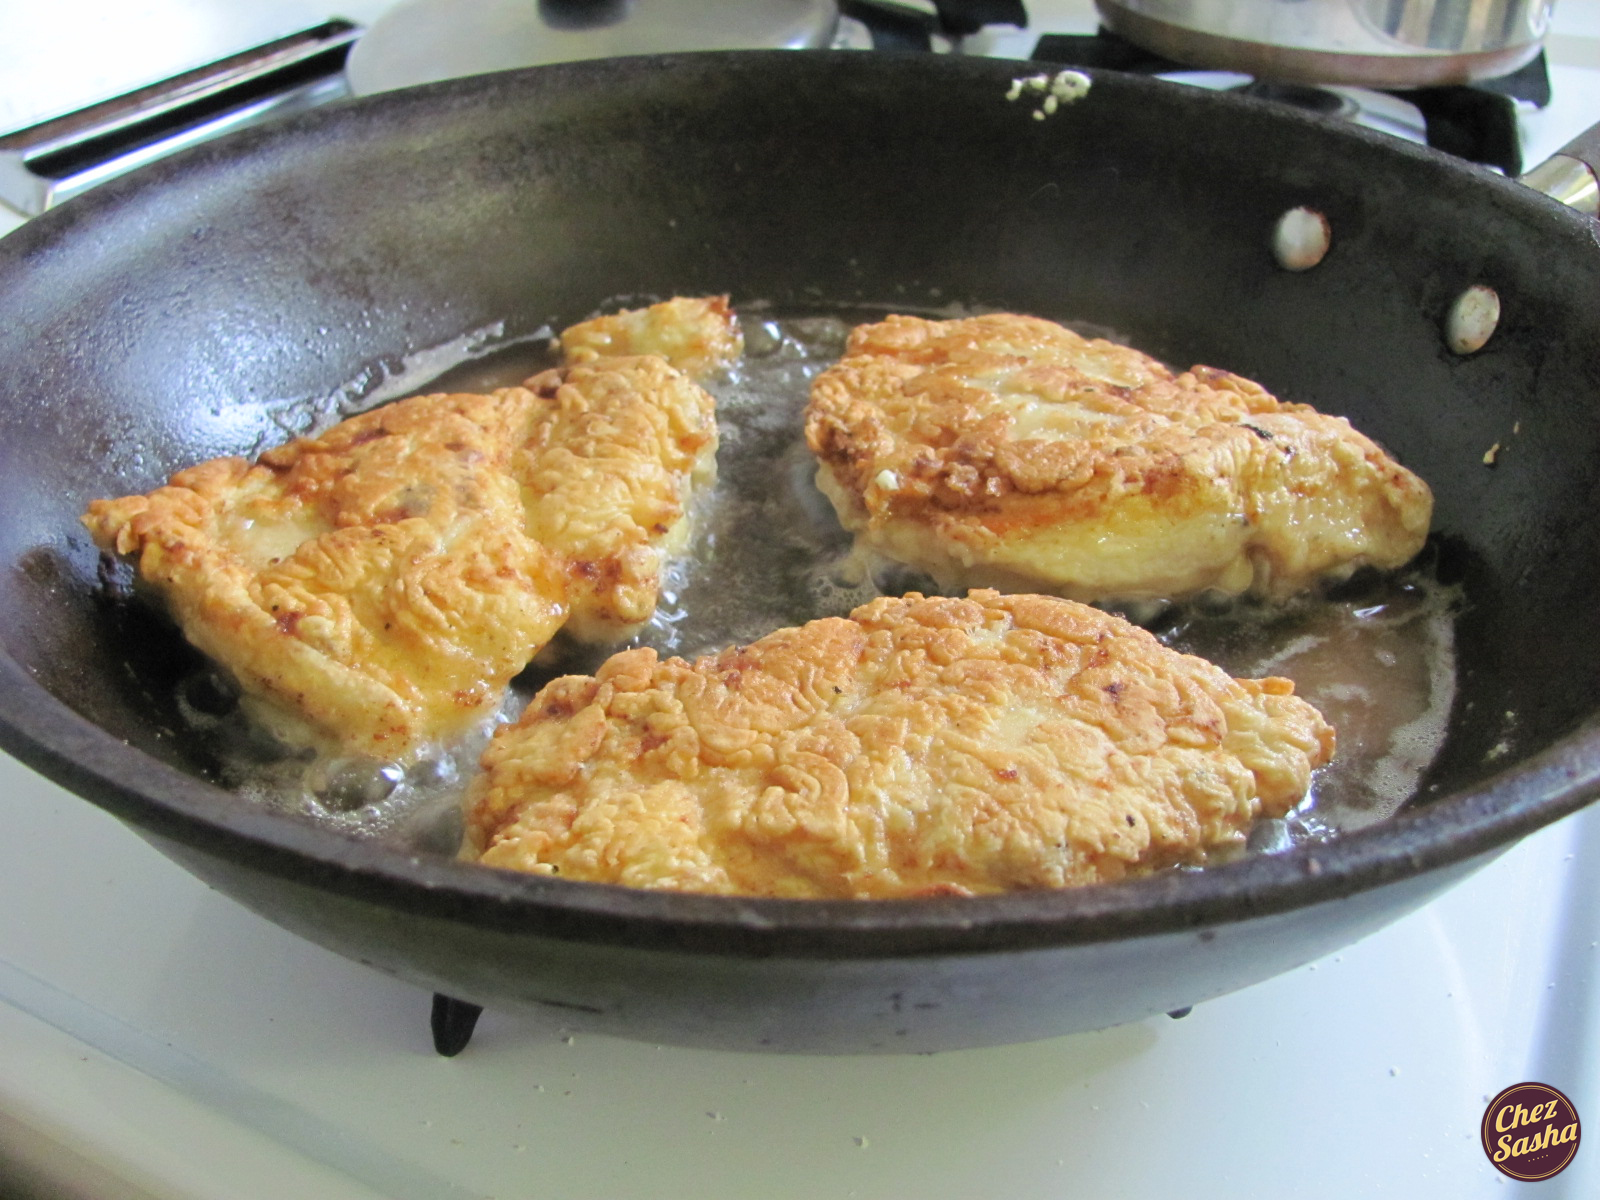
Either way, I’m kind of on the fence about this recipe now. I guess I’m just gonna have to test it out again. And then maybe once more ;)

I served the chicken with sriracha mayo: 1/3 c mayo, 1 tsp sriracha, 1 tsp lemon juice. You can’t go wrong with sriracha, by the way; it’s my new favorite condiment. If you’re still living a sriracha-less life, I suggest you get off your pretty little behind right this minute and purchase a bottle ASAP!

Roasted tomato bruschetta

It so happened that we had an over-abundance of bread and tomatoes chez moi this week. This situation could have also been dealt with by making this French toast but I’ve already blogged about it and what would be the fun in that? So I got creative.

Bruschetta - "BROO-SKET-AH"

(Yield: About 12 pieces)

Ingredients:

4 large vine-ripe tomatoes, quartered

2 tbsp olive oil

2 tbsp balsamic vinegar

2 cloves garlic, chopped

1 tbsp sugar

Salt/pepper

A generous handful of parsley

Graten Parmesan cheese for garnish

Crostini (recipe follows)

Procedure: Preheat oven to 450F. Toss tomatoes in oil and vinegar and leave cut side up. Sprinkle with sugar, salt, pepper and garlic.

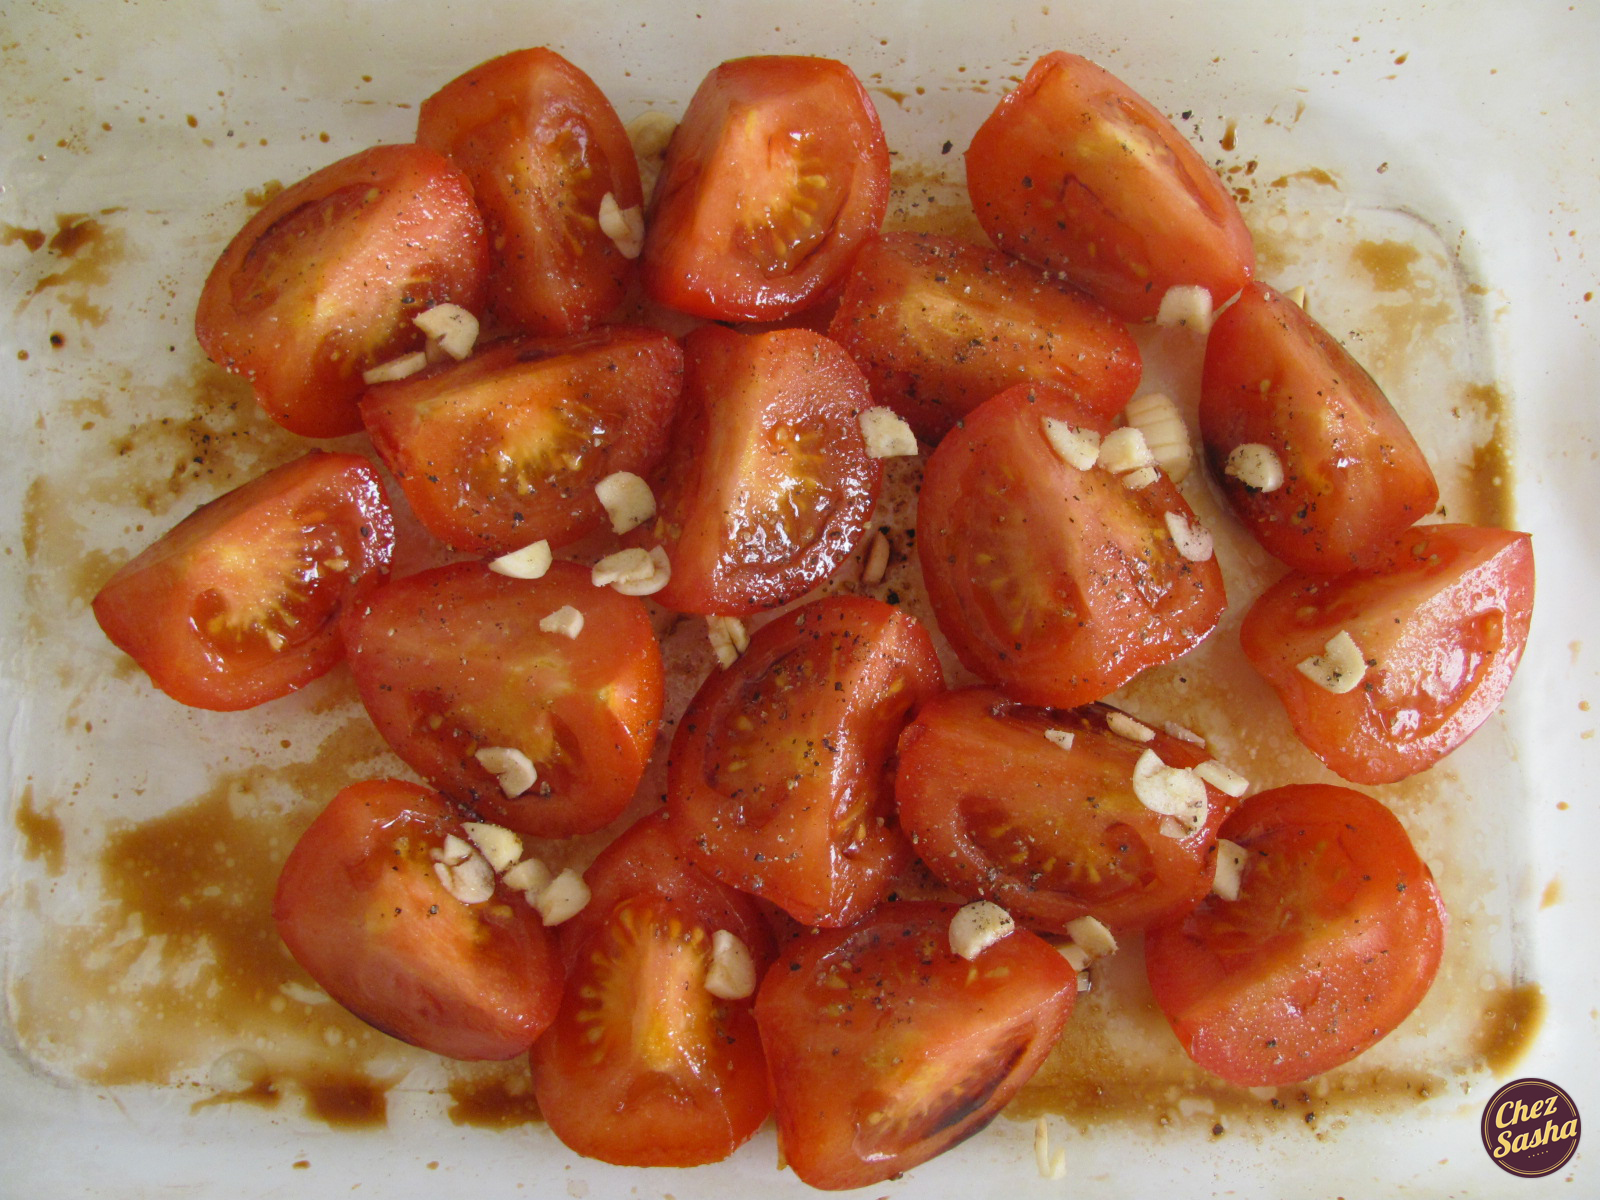
Roast for 30 min. Remove from oven.

Place tomatoes into food processor and add parsley. Pulse until combined but still chunky.

How to make crostini: Preheat broiler. Place slices of day old bread on broiler-safe baking sheet and drizzle lightly with olive oil. Place into broiler and toast until golden brown – this shouldn’t take more than 2-3 min. Top crostini with bruschetta and cheese, and serve immediately.

Flavorwise, this bruschetta turned out ah-mazing. For a thicker texture next time, I think I will squeeze some of the juice out of the tomatoes prior to roasting them.

Falafel w/ yogurt dipping sauce

Not too long ago, falafel was a sure fire sign of a good time for me. Over this past summer, my friends and I made it a point to go “dirty bar hopping” at least every other weekend, in either the East or West Village. These nights, more often than not, ended around four in the morning, with the acquisition of falafel sandwiches – at a thrifty $3 each - from Mamoun’s. If we were able to make it there by the end of the night, with our limbs and intestines intact, the night was considered a success. We would join the out-the-door line of belligerent young people like ourselves and wait to be handed our respective crispy falafel sandwiches, in a pita, with lettuce, tomatoes, onions and tahini sauce.

As of late, falafel has become quite repulsive to me. Every now and then, I work as a server in a catering hall on the weekends for extra cash. Falafel is a big hit over there, and even though their version tastes alright, it’s hard to appreciate it after seeing how the chef prepares it. Basically, there’s a vat of falafel dough, into which he plunges an ice-cream scoop and releases his prey into the depths of the deep-fryer, the oil in which is nearly black. Yes, I know, Mamoun’s technique is probably no different, but the experience is just completely different when I’m working, as opposed to when I’m drunk and excited in the hot New York City night.

The other day I was going through some of my papers and found a list of dishes I’d planned to eventually cook. As I checked off Boeuf Bourguignon, I noticed the word falafel underneath and thought, “It’s time.”

(Yield: About 12 pieces)

Ingredients:

1 19 oz can chick peas, drained and rinsed

1 small yellow onion, diced

2 cloves garlic, chopped

1 generous handful of cilantro

1 tsp baking powder

1 tbsp cumin seeds

2/3 tsp salt

2/3 tsp freshly ground black pepper

Cayenne pepper to taste

5 tbsp flour, divided

1 tbsp sesame seeds

Vegetable or Peanut oil for frying

Procedure: Combine the first 9 ingredients in a food processor with 3 tbsp flour. Pulse until combined but not pureed.

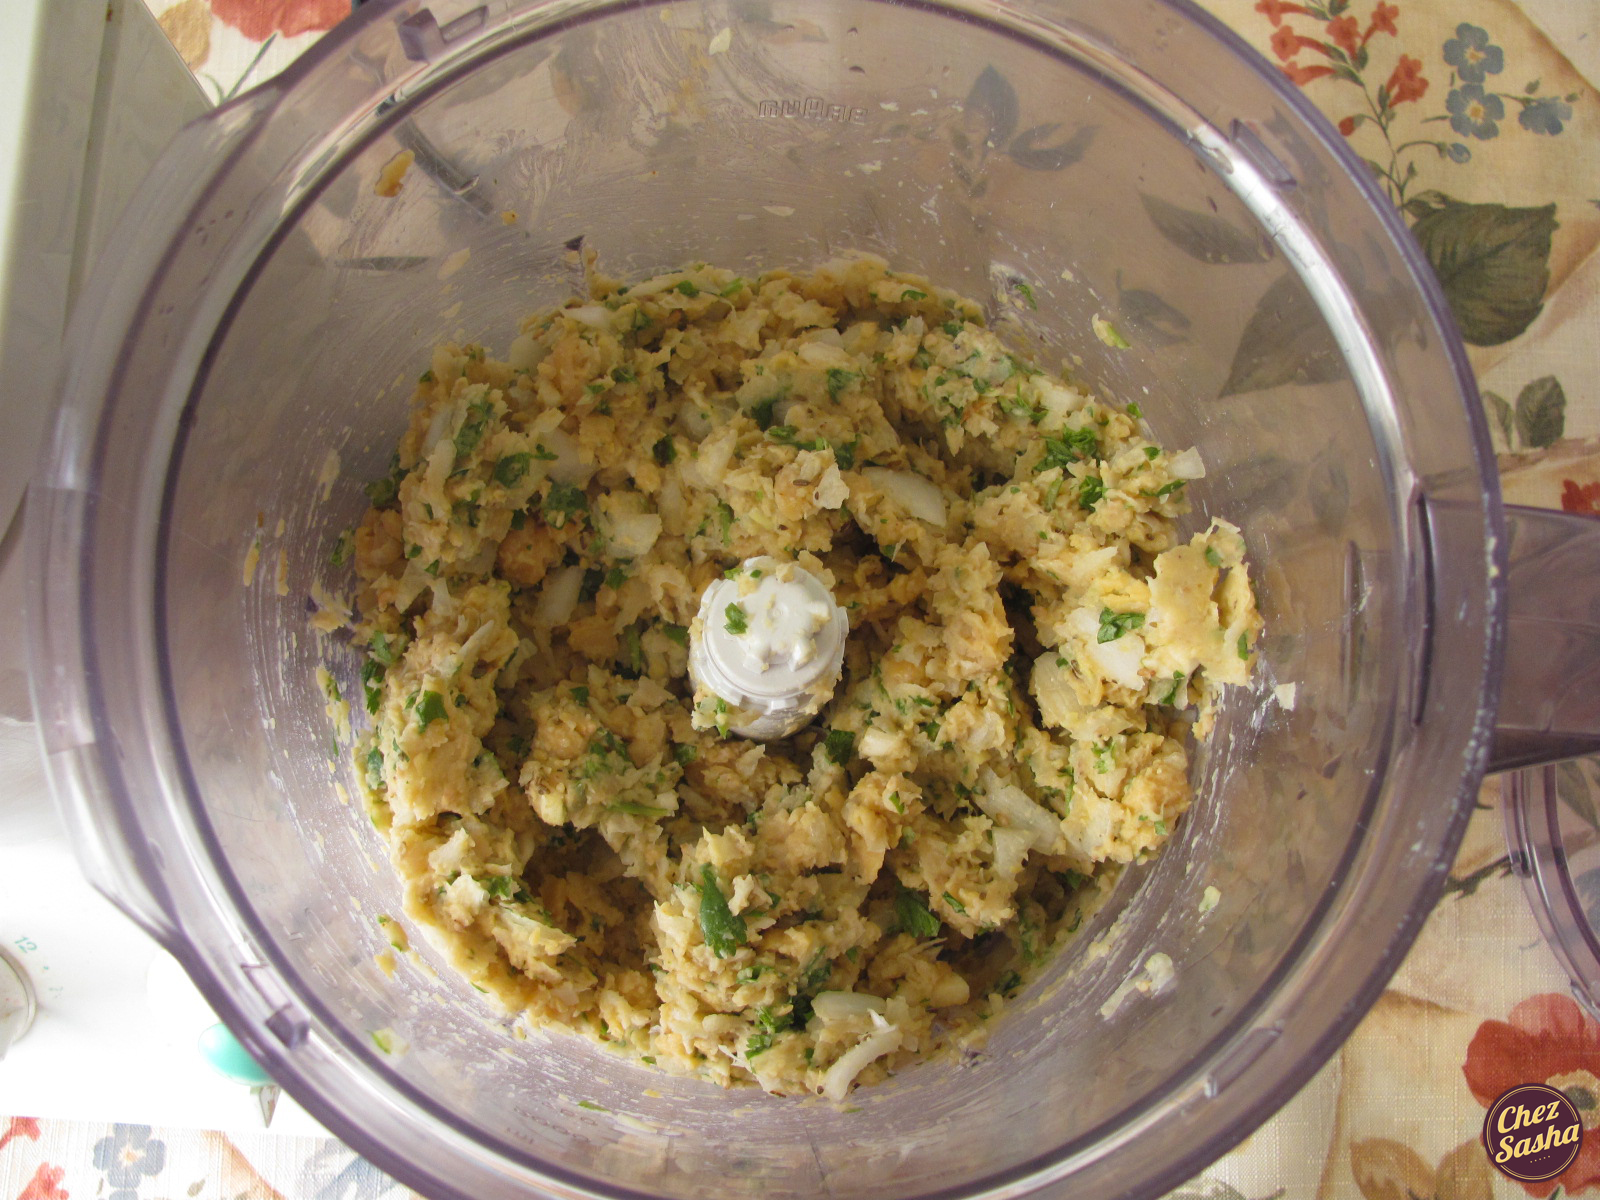
Taste and re-season if necessary. Cover and refrigerate for 30 min. In a shallow dish, combine the remaining flour and sesame seeds. Heat a skillet over medium heat and add oil. When the oil ripples gently, it’s ready. Moisten your hands with water and hold about a tablespoon’s worth of dough in your palms; roll gently into a ball and press to form a patty.

Dredge in flour, shake off access, and place in skillet. Place patties about 1/2” apart. Fry 4-5 min per side, or until golden brown. Drain on paper towels and serve hot.

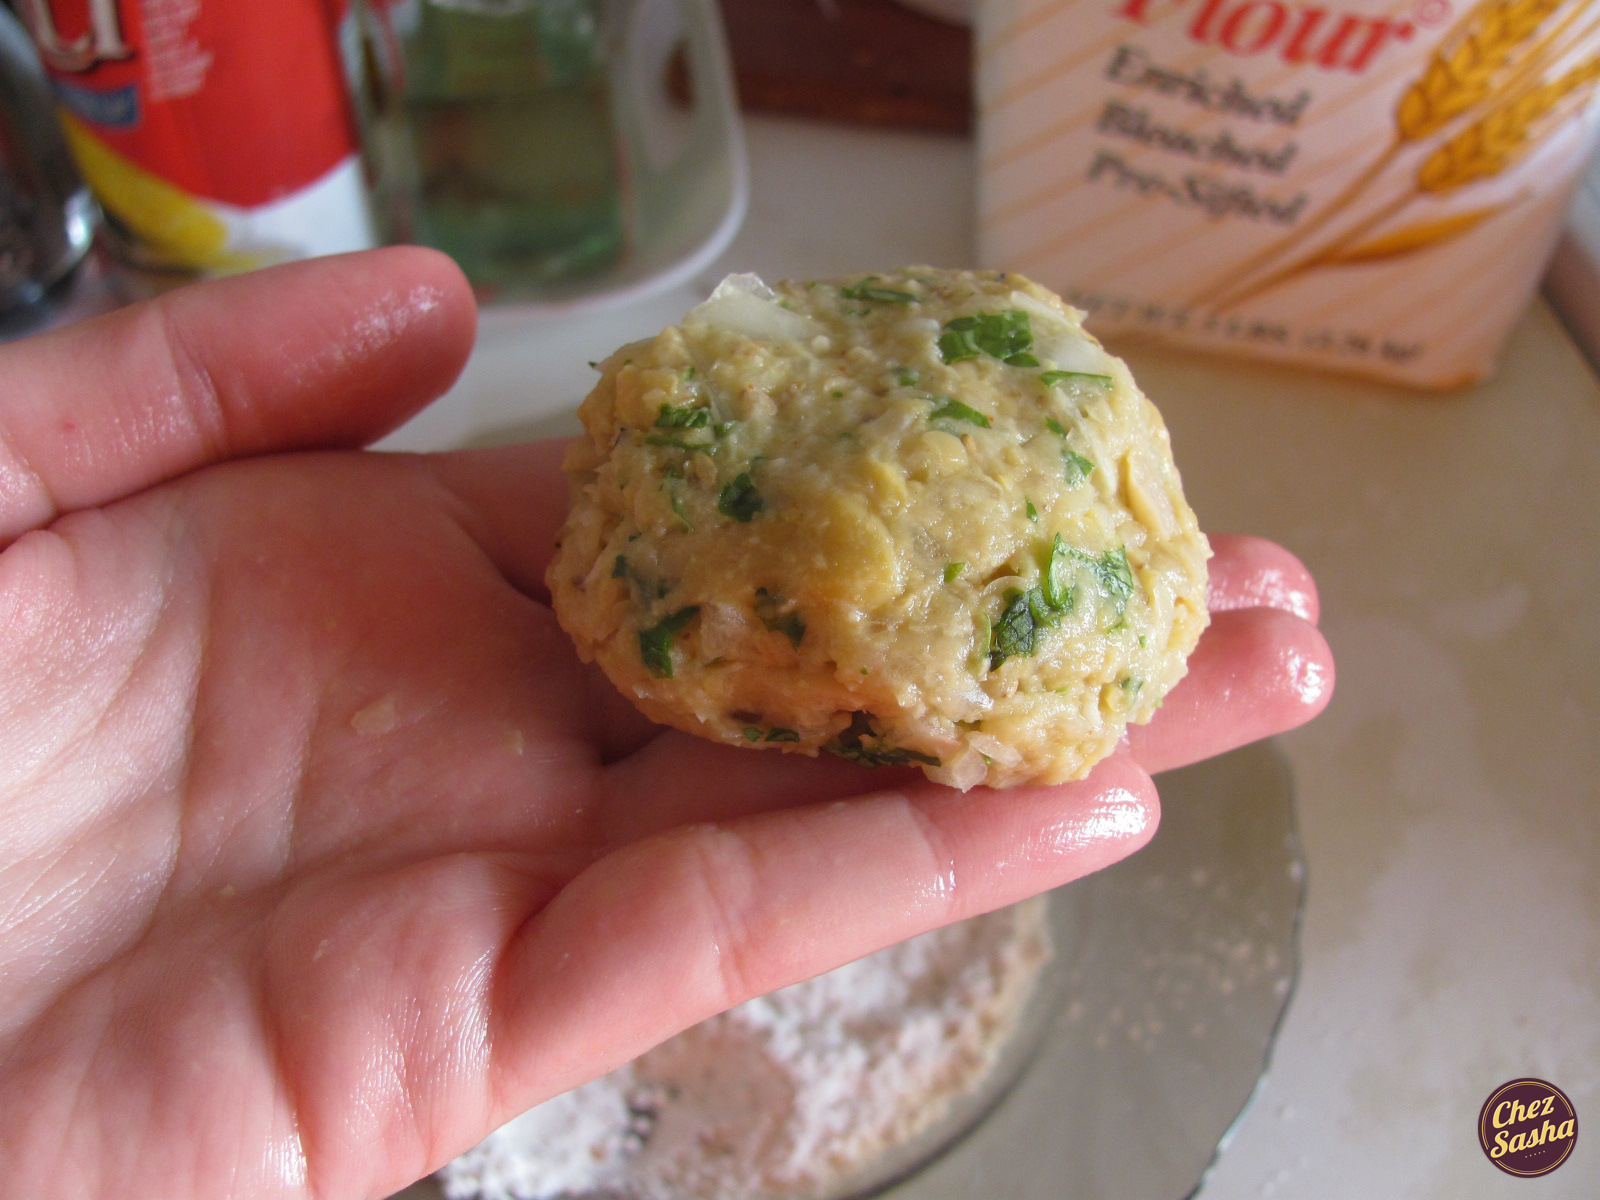
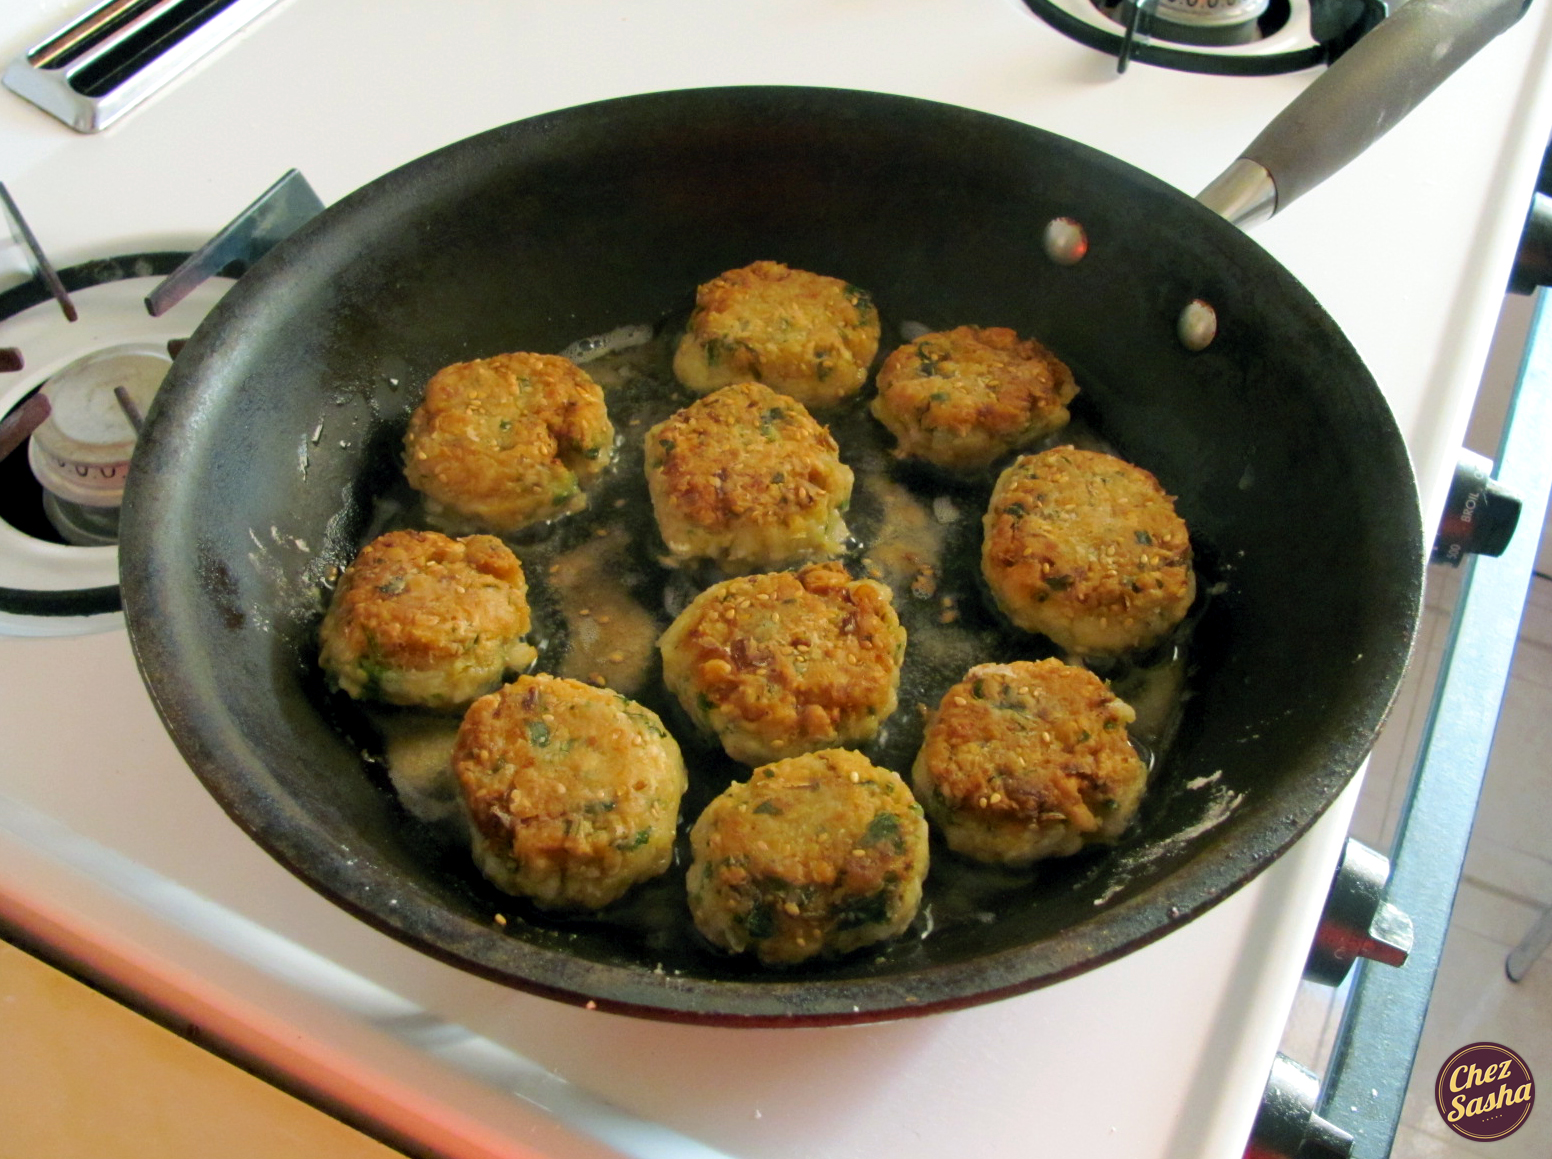
These turned out pretty good but not exactly what I expected. I think next time I’ll use bread crumbs instead of flour. But, the yogurt sauce I served them with (1/2 c plain yogurt, a handful of cilantro, chopped, and 1 tbsp lemon juice) was perfection.

Pan-seared sea bass w/ parsley pesto and penne

Most amateur home cooks fear cooking fish at home. Unless we are talking salmon and you live in apartment (the smell will linger for days!), there is nothing to be afraid of. When frying sea bass, keep the following in mind:

1.) When using frozen fish, make sure it is completely de-frosted before you work with it.

2.) Rinse it and dry it with paper towels.

3.) Heat a skillet over high heat and add enough oil to cover the bottom.

4.) Do not overcrowd the skillet - this will cause the temp. of the oil to drop.

5.) Do not fuss with the fish. Cook it 3-4 minutes per side and flip only once!

This recipe is easy, delicious and, in my humble opinion, quite impressive.

(Yield: 4 servings)

Ingredients:

1 lb sea bass fillets

3-4 tbsp vegetable oil

3/4 lb penne pasta, cooked al dente according to package directions

Salt/pepper

Lemon slices for garnish

Pesto:

About 1 c parsley

2 cloves garlic, roughly chopped

2 tbsp lemon juice

1 tsp lemon zest

1/4 tsp salt and 1/4 tsp cracked black pepper

4 tbsp extra virgin olive oil

1/3 c freshly-grated Parmesan cheese

Cook the fish: Heat skillet over high heat and add veg. oil. Season fish with salt and pepper on one side. Place in skillet (in 2 separate batches) seasoned side down and season the other side. Cook for 3-4 min, flip, and cook 3-4 more min. Let the fish rest on paper towels. In the meantime…

Make the pesto: Place the parsley, garlic, lemon, salt and pepper into a food processor. Grind until fine. With the motor running, pour the oil down the chute. Pour mixture into a bowl and stir in cheese.

Assemble: Reserve 2 tbsp of pesto and combine the rest with cooked pasta. Divide pasta into 4 serving plates and top with a piece of fish. Drizzle remaining pesto over the fish and garnish with lemon. Voila!

Baked turkey meatballs in roasted red pepper sauce

The recipe for these meatballs is loosely based on Alton Brown’s recipe - watch the video. It’s quite educational. But the sauce was all my idea. So ha!

This is one of those recipes with lots of ingredients and several steps so I recommend reserving it for a weekend dinner.

(Yield: 18 balls/about 6 serving)

Ingredients:

1 1/2 lbs. ground turkey

1/2 c grated Parmesan cheese

1 egg, beaten

1/2 c bread crumbs, divided

1 tsp dried parsley

1/2 tsp salt, 1/2 tsp pepper

Sauce:

4 red bell peppers

2 tbsp olive oil, divided

1 tbsp butter

1 yellow onion, diced

4 cloves garlic, minced

1/2 c dry red wine

1 tbsp flour

8 oz canned diced tomatoes

1/2 tsp dried parsley

Cayenne pepper to taste

Salt/pepper

Parmesan cheese for garnish

Procedure for meatballs: Gently combine all ingredients (only use half of bread crumbs!) in a bowl using fingers. Cover with plastic wrap and refrigerate for 1 hour. Preheat oven to 400F. Line a baking sheet with foil. Place remaining bread crumbs into cappuccino cup or a small bowl. Using an ice cream scoop to measure, form turkey mixture into balls between palms and place onto sheet. Roll each ball in crumbs by swirling cup (if you don’t understand what this means, watch the video!)

Place balls 1 inch apart on tray. Bake for 20 minutes…

Until they look like this…

Procedure for sauce: Preheat oven to 375F. Line a baking sheet with foil. Rub peppers with half of oil.

Bake for 30-35 min until blistered. Remove from oven and let cool before handling. Peel and discard skin. Remove seeds and discard. Dice flesh and set aside.

Heat remaining oil and butter in a saucepan over medium heat. Add onion with a pinch of salt and sweat out for about 5 min. Add garlic and cook for 1 min. Add wine, turn heat down, and simmer for 4 min. Stir in flour and cook for 1 min. Add peppers, tomatoes and seasonings. Stir, cover with lid and cook for 15 min. Place sauce into food processor, or proceed with immersion blender, and puree to desired texture. Pour sauce back into saucepan and re-season if necessary. Nestle meatballs into sauce and reheat for several min.

Serve over pasta, topped with cheese.

Creamy shallot and mushroom steak sauce

I have been trying to achieve the perfect, juicy, pan-seared steak for years and I do believe I have finally done it. I went to Morristown, NJ to visit my friend Ally last week and I made us quite the dinner: pan-seared rib eye steak, smashed baby potatoes with roasted garlic and Caesar salad.

Steak procedure: Once you have your hands on some good quality, well-marbled beef, 1. Bring the meat to room temp. 2. Rinse and pat dry with paper towels. 3. Preheat some oil in a large skillet on high heat. 4. Season one side of steak as desired. 5. Place seasoned side down in skillet and season reverse side. 6. For 1″-thick steaks, cook for 4 min on each side flipping once, for medium. (3 min for rare, 5 min for well done) 7. Take steak off skillet and let rest for 5-7 min prior to consumption. 8. Enjoy.

If ya’ll have any tips for cooking steak at home, please share!

Now for the sauce: it is the perfect compliment to beef and is very easy to make.

(Yield: enough for 4 steaks)

Ingredients:

2 tbsp butter

1 shallot, sliced

8 oz baby bella mushrooms, chopped

1/4 c dry white wine

1/3 c heavy cream

Salt/pepper

Melt the butter in a large skillet (preferably the one you cooked the steak in) over medium heat. Add the shallot and sauté for 2 min to soften. Add mushrooms and sauté for about 7 min, stirring occasionally. Season with salt and pepper, and add wine. Cook for about 4 min to evaporate alcohol. Stir in heavy cream until incorporated. Serve immediately.

Thai coleslaw

The idea for this salad came from a wrap I ordered for lunch one day - a bad wrap. It consisted of poorly seasoned grilled chicken pieces and a medley of vegetables with a peanut dressing on the side. The wrap was overstuffed with vegetables and when I tried to pick it up and eat it, it fell apart. I gave up on its false identity as a wrap and consumed it with a knife and fork like a salad. Although the wrap was technically a failure, I loved how those vegetables tasted with that dressing.

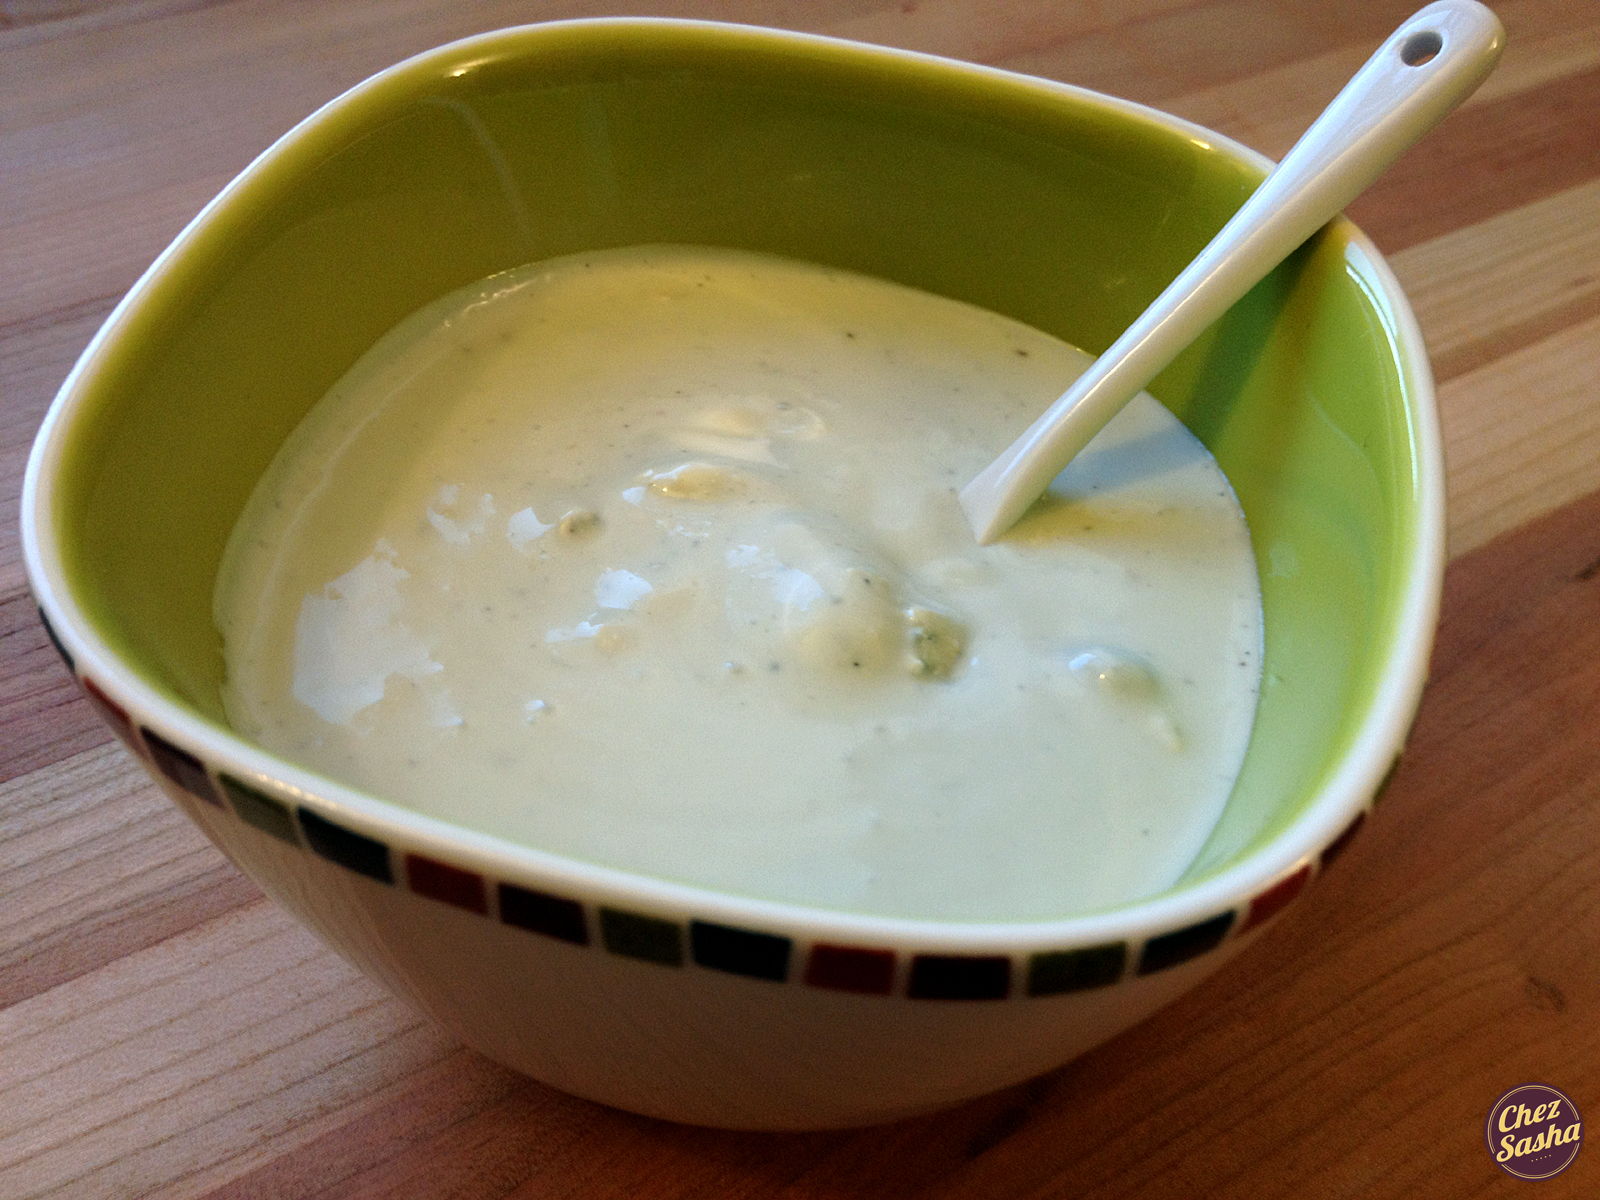
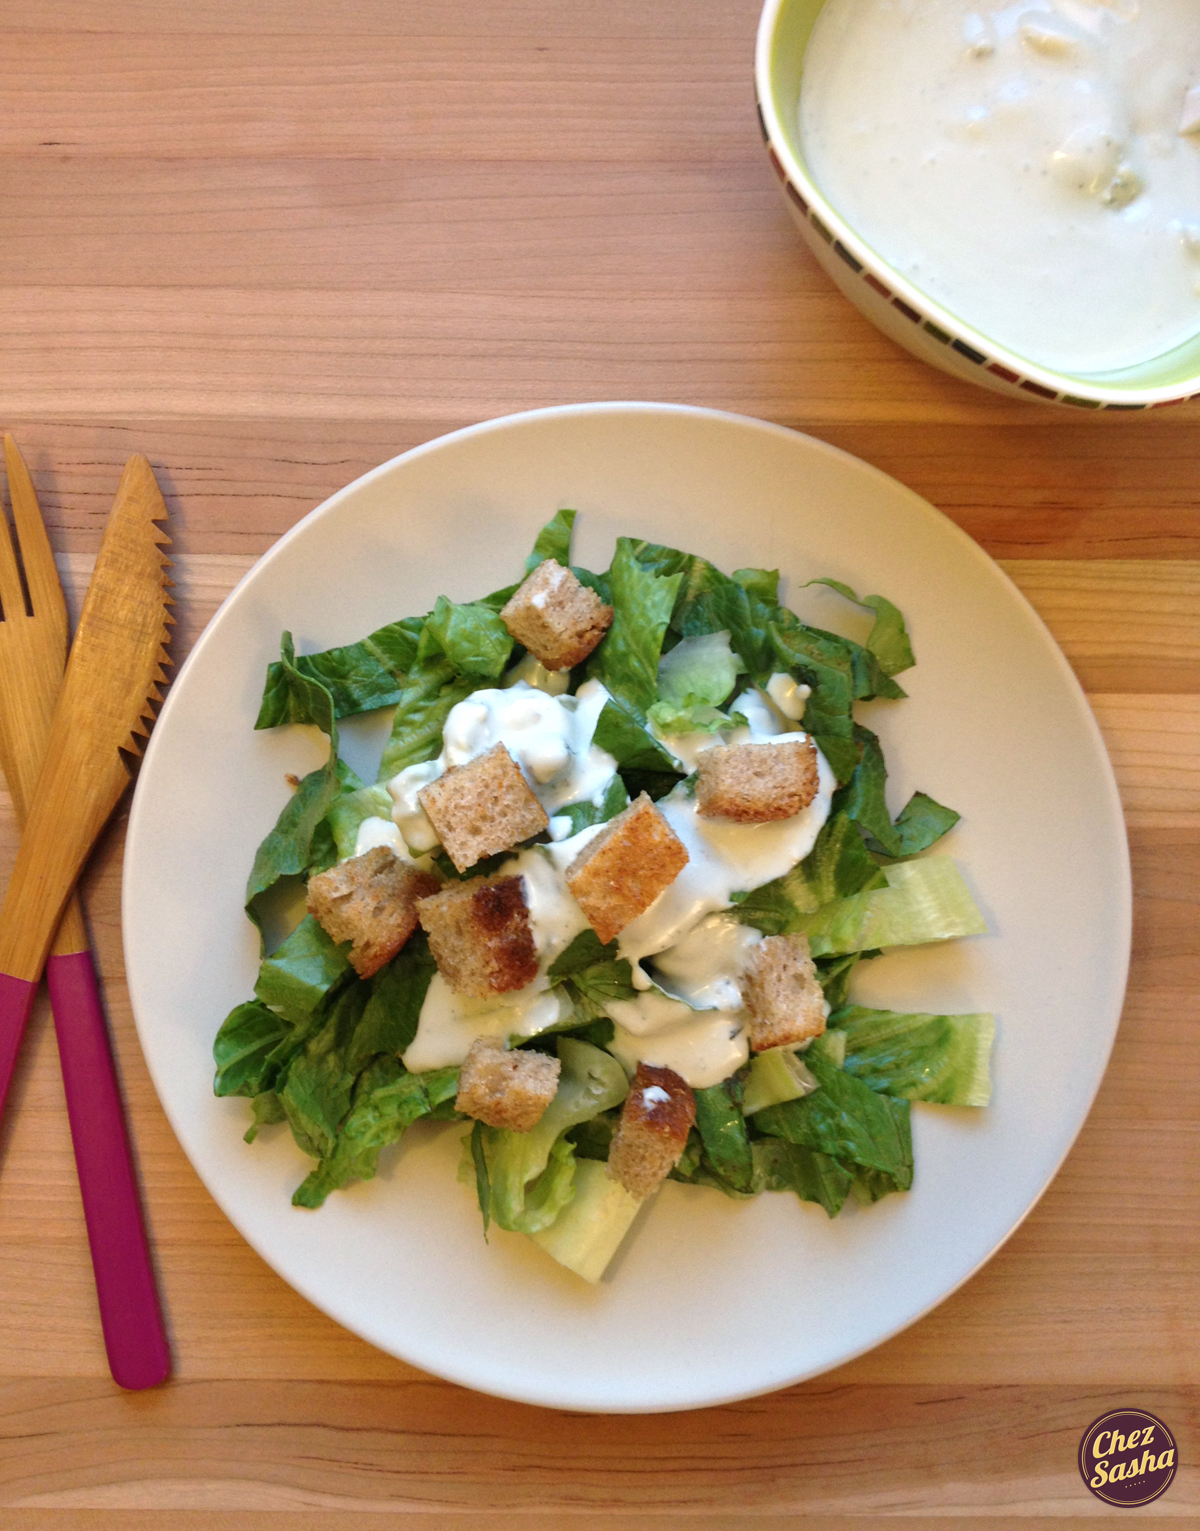
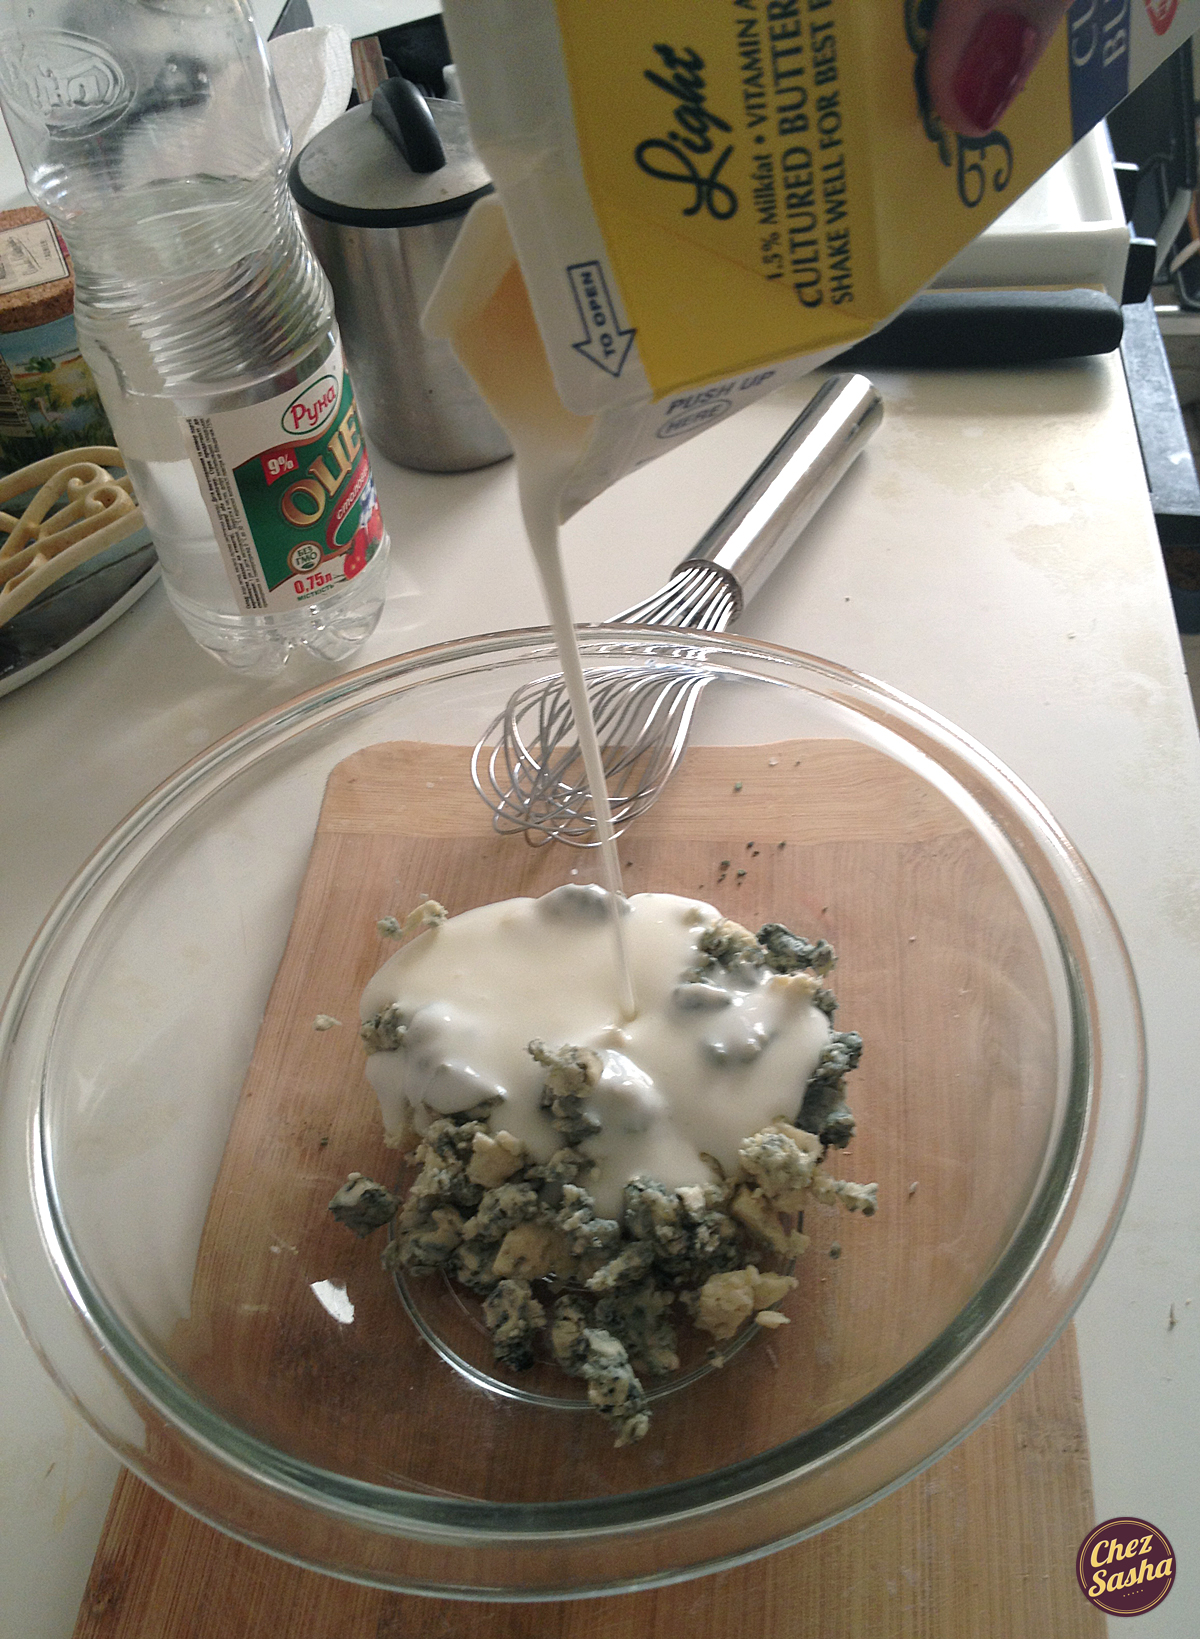
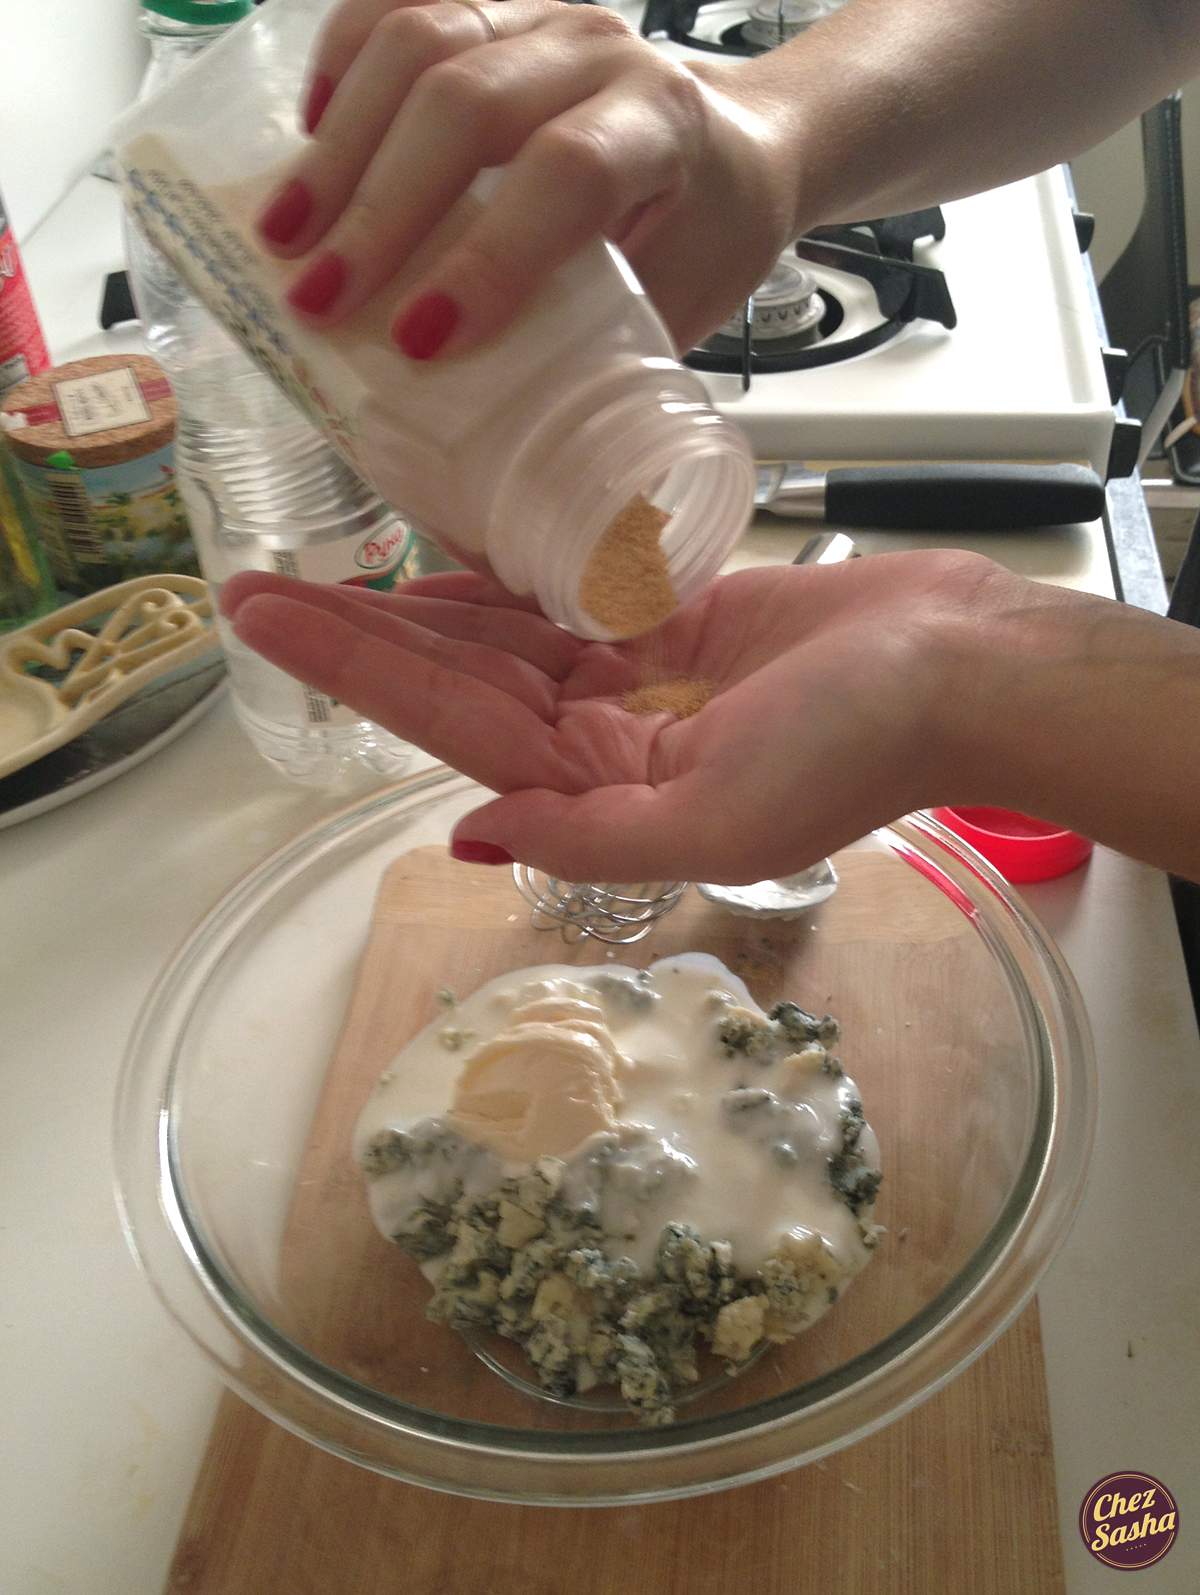
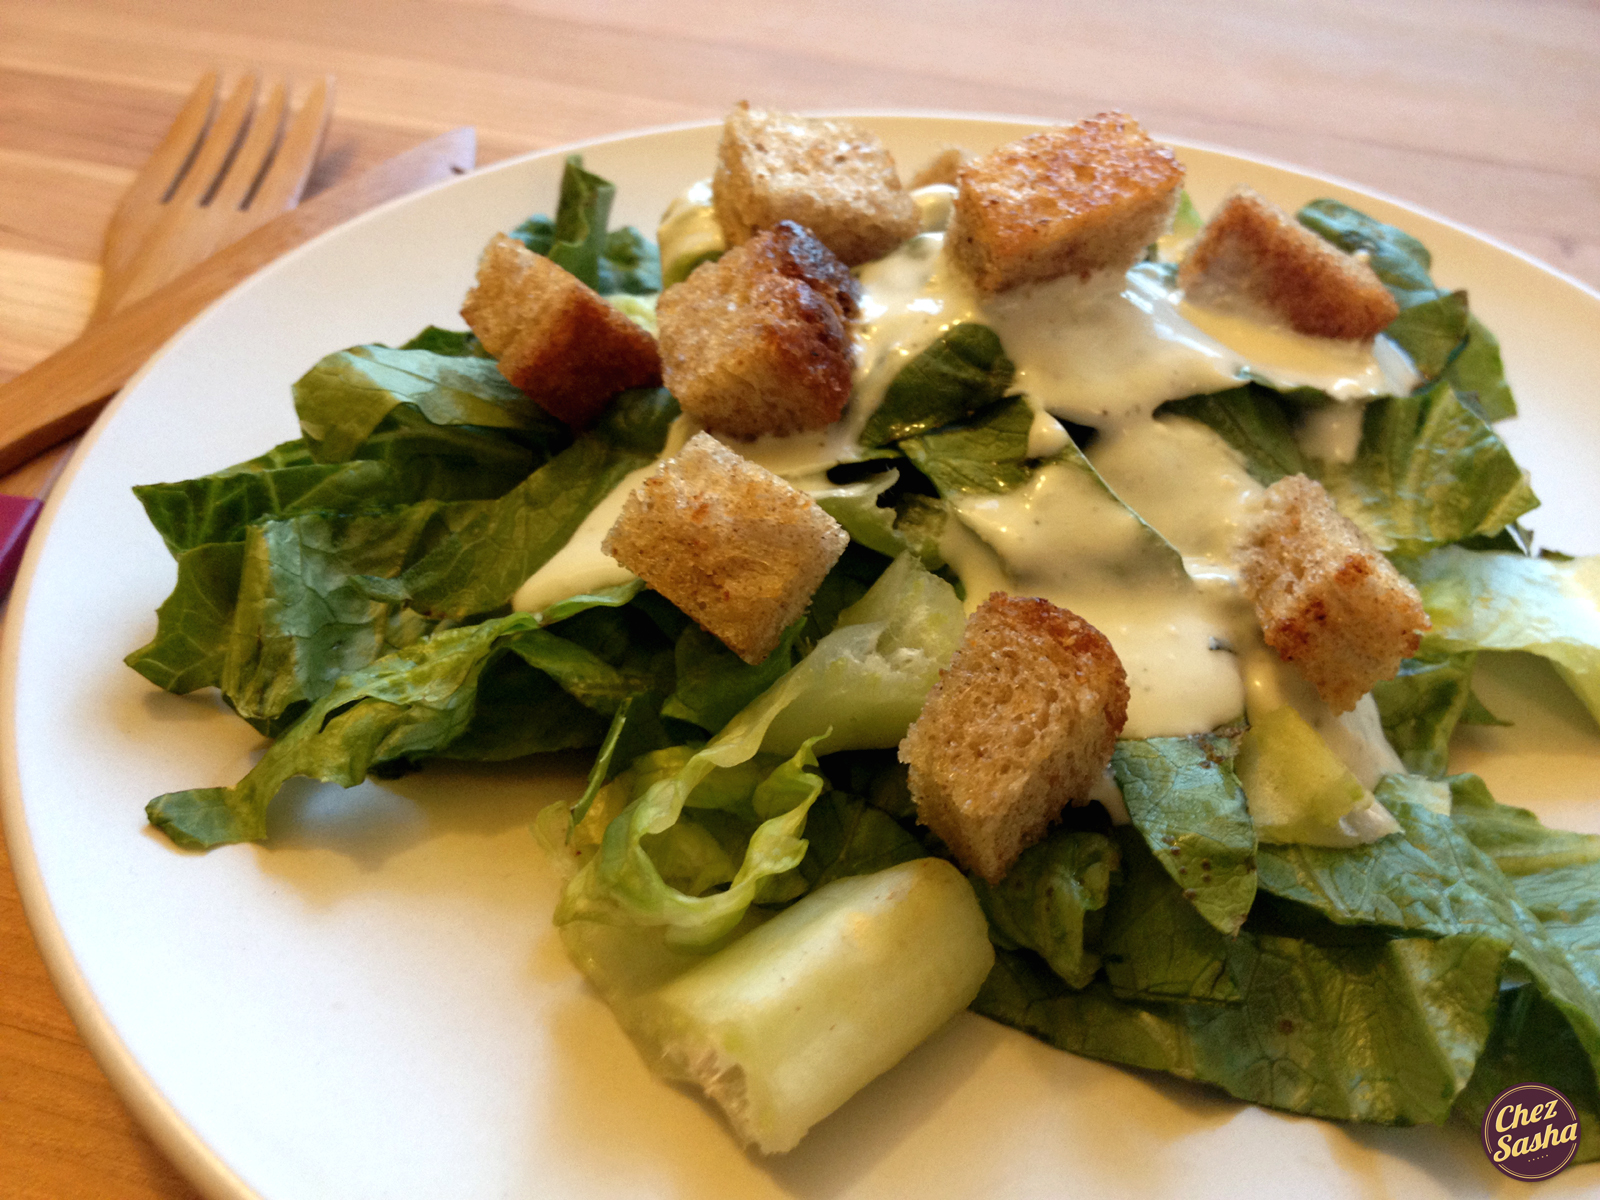
I decided to recreate that wrap, as a salad, without chicken. The salad was not a failure.
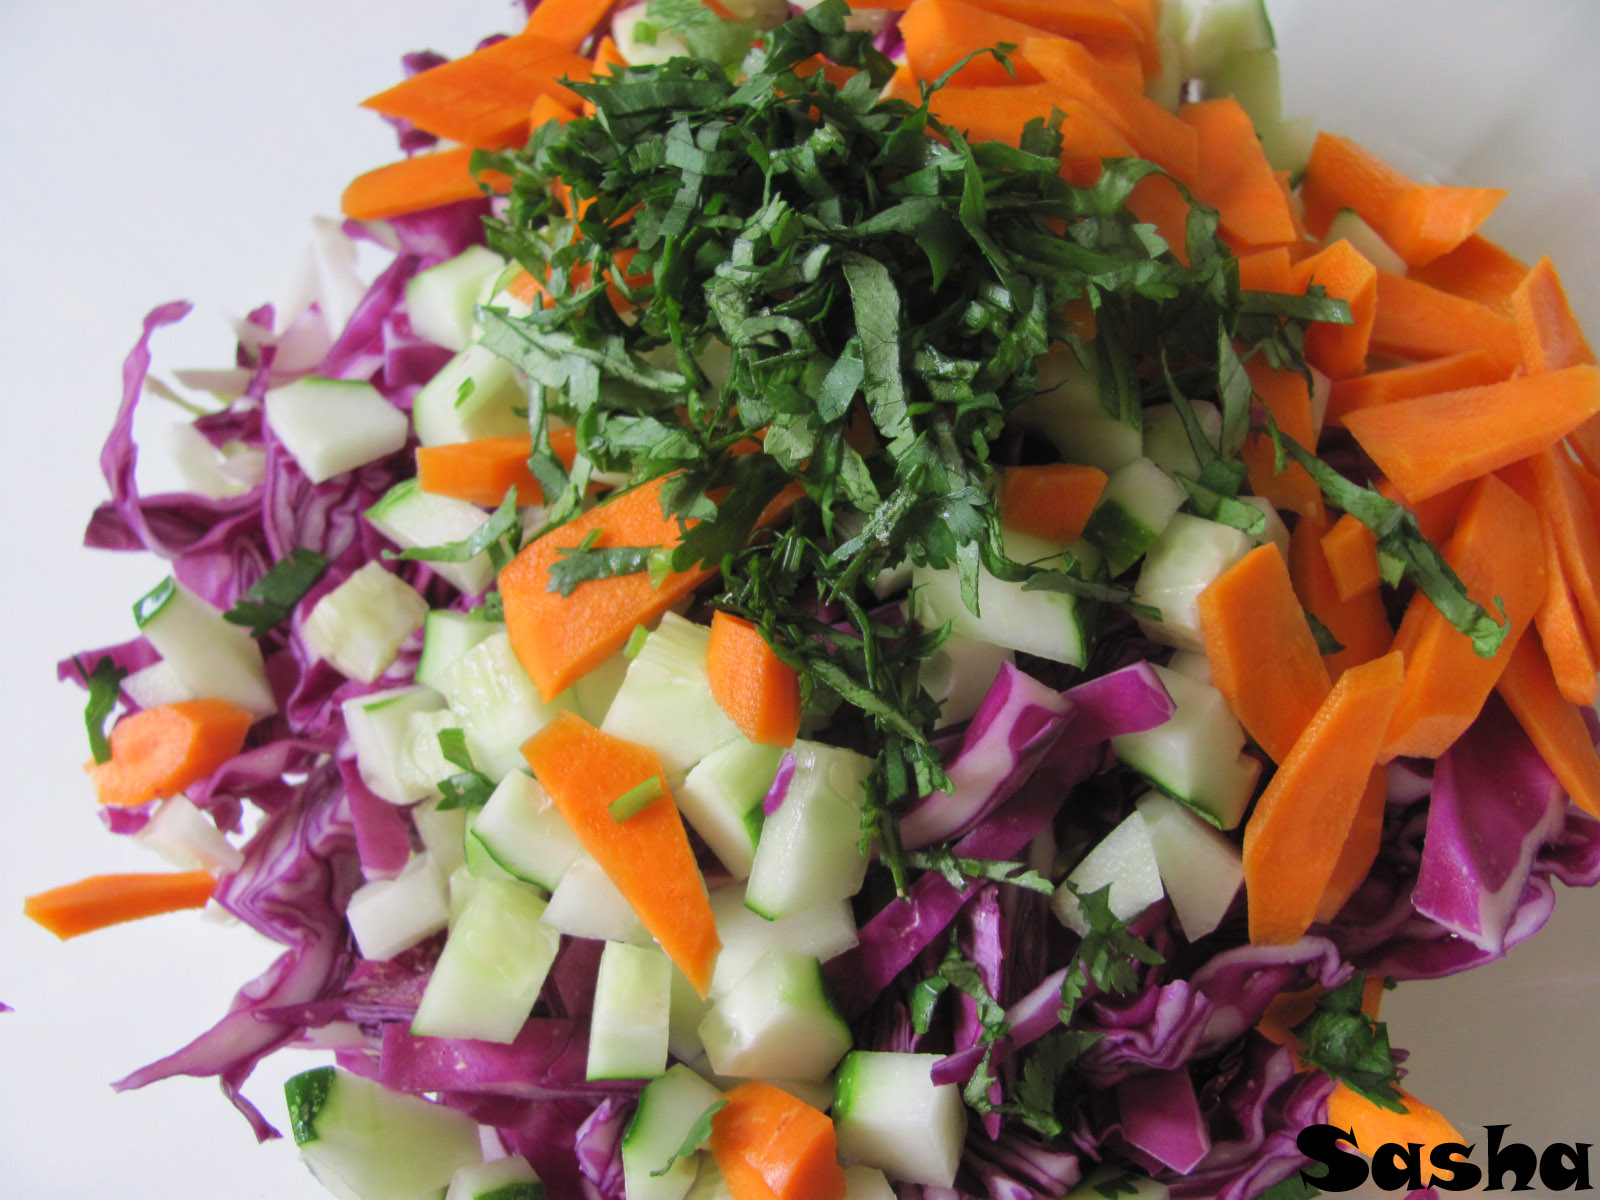
(Yield: 6 servings)

Ingredients:

1 c shredded purple cabbage

1 c shredded green cabbage

1 medium carrot, diagonally sliced

1 cucumber, partially peeled, diced

2 tbsp chopped cilantro

Procedure: Combine all ingredients in bowl.

Dressing:*

(Adapted from this)

1 cup creamy peanut butter

½ cup sesame oil

1/3 cup honey

½ cup pineapple juice

1 teaspoon freshly grated ginger

1/3 tsp cayenne pepper

1/2 tsp salt + 1/3 tsp black pepper

Procedure: Whisk together all ingredients. It may take a while to emulsify but it will happen. Stir in half of dressing into salad. Refrigerate the rest.

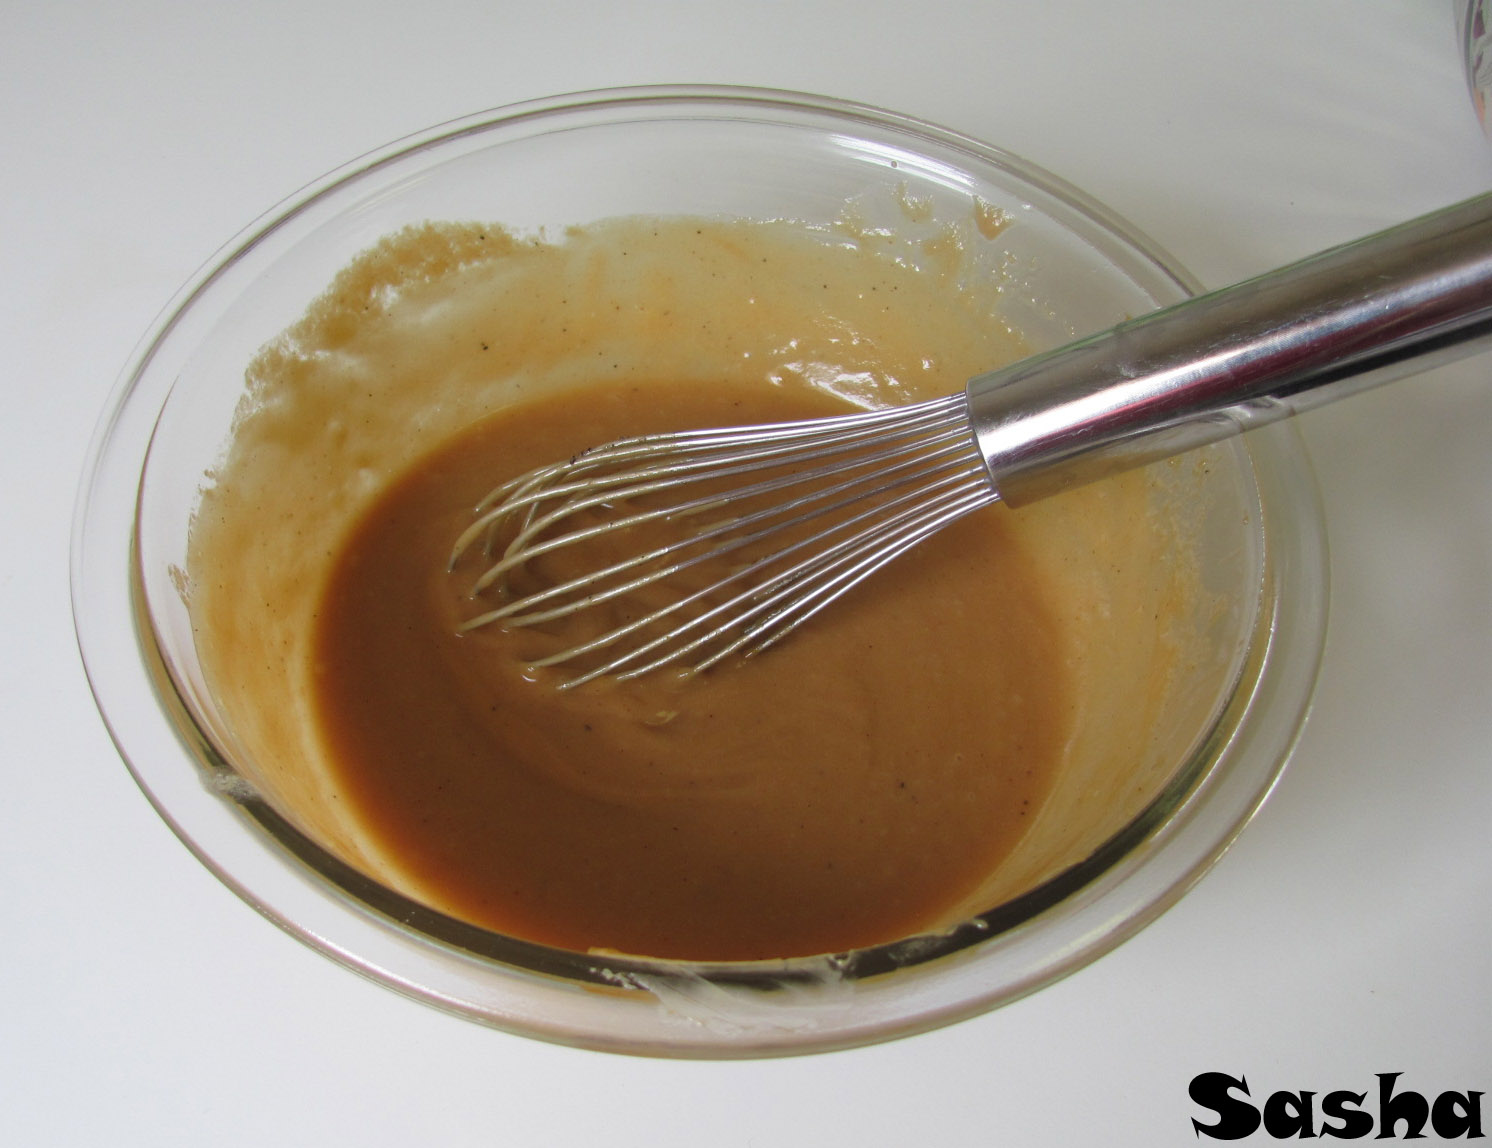
*This dressing may be used in all types of salads, or as a dipping sauce for chicken or spring rolls.