Chinese scallion pancakes

Last week I made my way back to Nom Wah and sampled some more of their goodies. (Those of you who follow me on Instagram may remember this photo?) And it’s official - they can do no wrong!

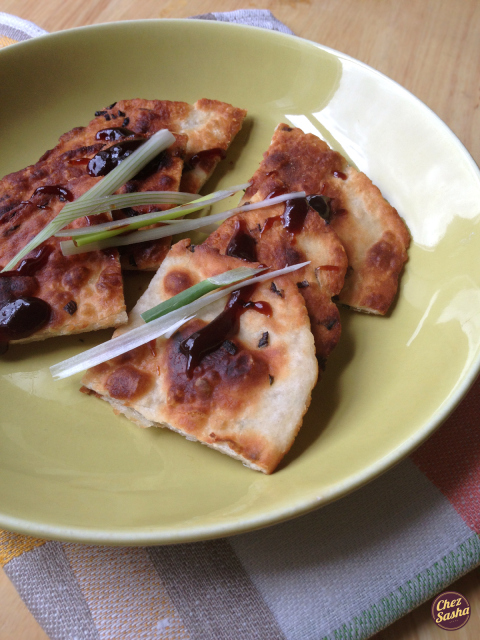
I have never had a scallion pancake up until that evening and as soon as I tasted the crispy, chewy awesomeness, I knew I had to make it at home as soon as possible. I found this recipe on The Sophisticated Gourmet blog and it can easily go down in history as one of the easiest recipes ever; the dough consists of only four ingredients, one of which is water.

Chinese scallion pancakes

This treat can play the role of a snack or replace chips/crackers at a cocktail party.

Recipe source: The Sophisticated Gourmet

(Yield: 8 pancakes)

Ingredients:

1 ½ cups all-purpose flour, plus more for dusting

1 ¼ teaspoons fine grain sea salt

3 scallions, divided (chop the green parts; thinly slice the white)

½ cup boiling water

Neutral tasting oil, for frying (not olive oil!)

Hoisin sauce for garnish or dipping

Chinese scallion pancakes

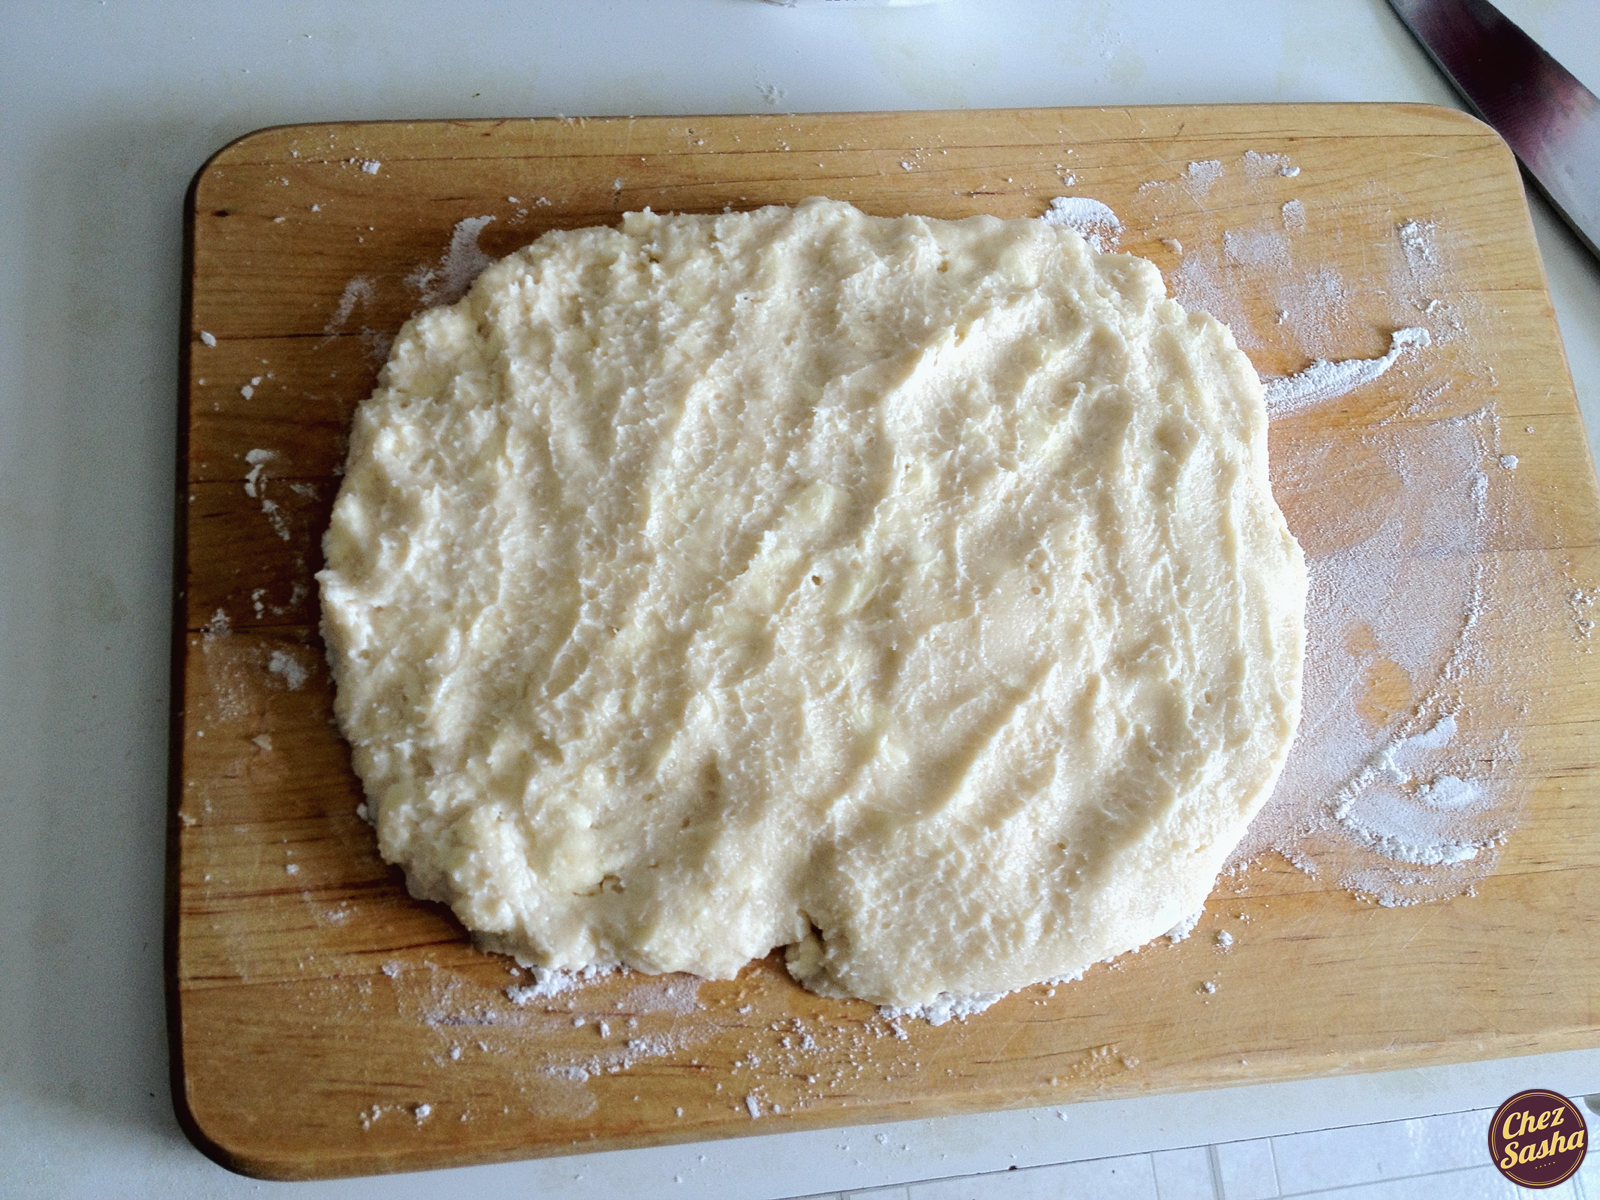
Procedure: In a large mixing bowl, whisk together flour, salt and the green parts of the scallions. Then slowly start to add the water and knead with fingers until it’s no longer sticky. If the dough is too dry, keep adding tablespoonfuls of hot water until a soft dough forms; it should be similar to the consistency of chewing gum. Remove the dough from the bowl, and knead on a lightly floured surface until soft and smooth, about ten minutes. Cover the dough with a damp cloth or plastic wrap, and let it rest for 30 minutes, or up to a day in the refrigerator.

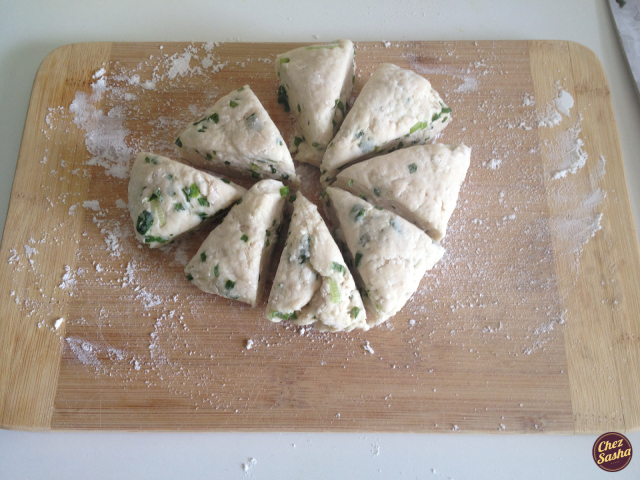
Then divide the dough into 8 pieces.

Chinese scallion pancakes

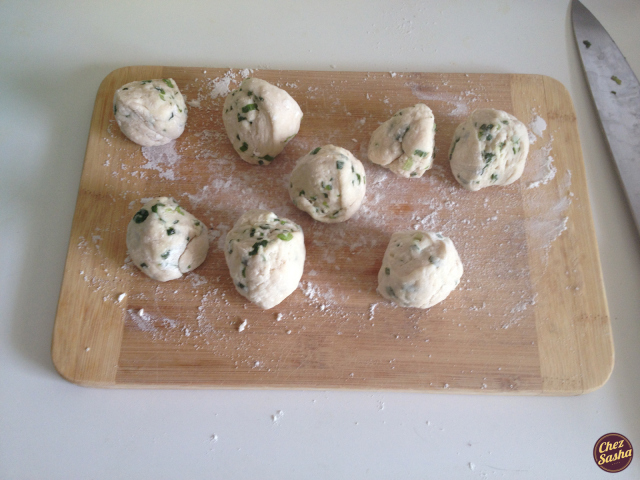
…And shape into balls.

Chinese scallion pancakes

Using your hands, form each piece of dough into flattened rounds. Using a rolling pin, roll each round of dough into pancakes on a floured surface, with about a 5″-circumference. To get perfect discs, give the dough a ¼ turn each time you roll. Then, heat a dry stir-fry pan, cast-iron skillet, or heavy-bottomed skillet over medium-high.

Chinese scallion pancakes

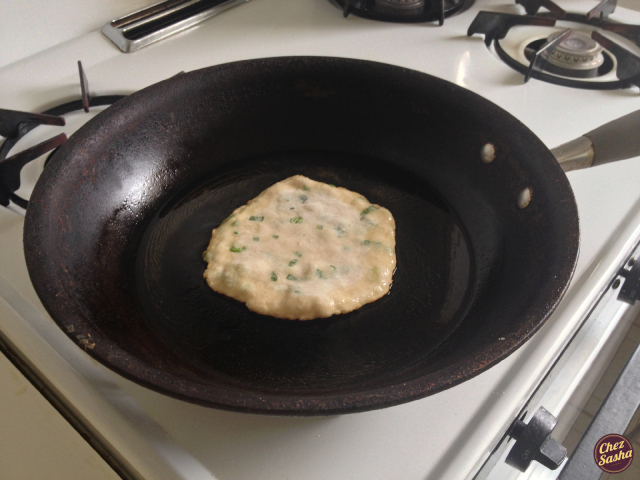
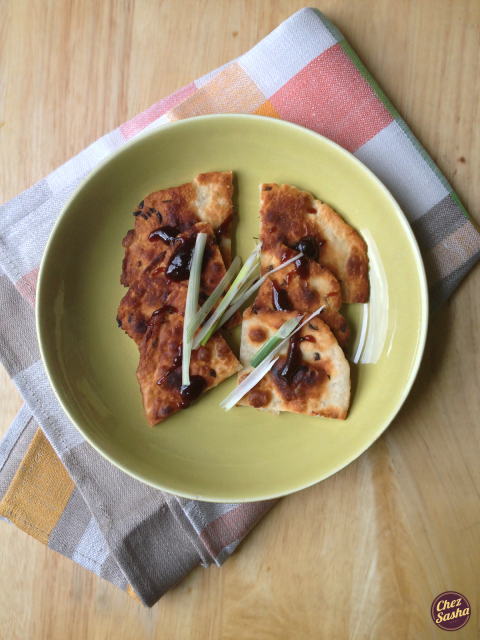
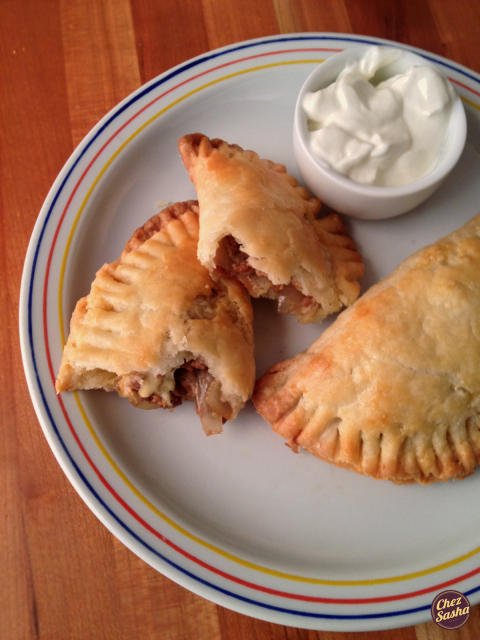
Pour in about ¼-inch of oil into the pan or skillet. Shallow fry each side of the pancake until light golden brown (about 1 minute for each side), pressing down around the edges of the pancake with a large spoon or spatula. Add more oil to the skillet and repeat the same for the remaining pancakes. Drain on paper towels, cut pancakes into quarters, drizzle with hoisin and top with remaining scallions. Serve immediately.

Chinese scallion pancakes

Beef and muenster empanadas

So it appears that this is my second post in a row in which I’m being the “My boyfriend and I this…” and “My boyfriend and I that…” girl. I know that this can be a little irritating to you, my dear readers, and I hate to do that to you, but there is just no way I can avoid mentioning Rene in this post. You see, empanadas are kind of a special thing for us.

Beef and muenster empanadas  (6) copy

There is a little place by Rene’s house in Brooklyn called Fiesta Chicken that sells rotisserie chicken and other specialties from the Dominican Republic. Probably more often that we should, we stop by this place on the way home to pick up the succulent chicken, yellow rice and beans, and our favorite, beef empanadas. All this food ends up weighing like five pounds and costs only about $10. The woman who works the counter knows us by now - she always smiles when we walk in and sometimes gives us little extras, like a salad or something. We take the food home, get into our pajamas, and eat it on the floor. Not because there’s no table, but because that’s just the way we like to do it. It’s not glamorous, but it is satisfying and so, so delicious. We always eat inhale the empanadas first. Again, they’re not gourmet or anything, but they are crispy, meaty and warm, which is exactly what we crave at the end of the day. Every time we eat them, we say “We have to try making these!” And last weekend, we finally got around to it.
Beef and muenster empanadas  (29) copy

(Yield: 1 dozen pastries)

Ingredients:

Dough recipe adapted from Alejandra Ramos

6 oz cream cheese, at room temp

6 oz unsalted butter, at room temp

2 c minus two tbsp all-purpose flour

3/4 tsp salt

Filling:

1 tbsp vegetable oil

1 large yellow onion, diced

1 lb ground beef

3 garlic cloves, minced

1 tsp cumin

1 tsp dried cilantro

1 tsp paprika

3/4 tsp cayenne pepper

4 oz canned tomato sauce

Salt and freshly ground black pepper

About 4 oz muenster cheese, sliced or shredded

Plus:

Extra flour for dusting

1 egg, beaten

1 tbsp water

Sour cream, if desired

Beef and muenster empanadas  (25) copy

Procedure: First make the dough. Beat cream cheese and butter in a mixer or food processor on high until smooth and creamy. Switch speed to low and add flour slowly until completely combined. Remove dough from bowl and shape into a ball. Cover with plastic wrap and refrigerate for one hour (can be made ahead up to 48 hours). While dough chills, prepare the filling. Heat the oil in a large skillet over a medium flame. Add onion with a pinch of salt and cook until softened, about 4 min, stirring occasionally. Add garlic and cook another minute. Then add beef with 1/2 tsp of salt and all the other spices. Break up beef with a wooden spatula and cook, stirring occasionally, until browned, for about 7 min. Add tomato sauce and cook for another minute. Turn heat off, taste and re-season if necessary. Let the filling come to room temperature before making pastries.

Preheat oven to 350F. Line a baking sheet with parchment paper or foil. Remove dough from the fridge and let it rest at room temp for 2 min. (Separate ball into 2 pieces, if desired). Dust your counter and rolling pin with flour, and roll out dough to 1/6″-thickness. Use a 4″ round cutter or upturned bowl to cut out circles, rerolling and cutting any remaining scraps. Fill each circle with about 2 tbsp of filling and top with cheese. Fold over and crimp and seal edges, using a fork. Place on baking sheet and repeat with remaining dough. In a bowl, whisk together egg and water, and brush tops of pastries with egg wash. Bake for 20-25 min, until empanadas are golden brown. Serve hot, with sour cream if desired.

Beef and muenster empanadas  (50) copy

Do you have any strange yet comforting food traditions?

Any ideas for intesting empanada fillings?

Berry cobbler

My cousin Donna recently paid me a visit and we planned to spend the day roaming around the city. We woke up in the morning to the sound of rain and thunder outside, and the weather forecast predicted rain for the rest of the day. We were pretty bummed but decided not to despair and spend the day baking something yummy instead.

I went through my manila folder of torn out food magazine pages (Why yes, I do have one of those. I’m old-fashioned, OK?) and picked this recipe from the June 2012 issue of Martha Stewart Living out of the stack.

The recipe calls for raspberries but I used half raspberries and half strawberries.

The fruit is topped with squares of shortcut pastry, which calls for butter AND heavy cream.

My squares kind of melted into each other but that was because I didn’t account for the size of the pan when preparing it.

The cobbler turned out quite magnificent - the berries got all mushy and sort of gelatinous, while the topping was crunchy and flaky on top and chewy on the bottom.

Click here for the full recipe!

Gnocchi au Gratin

First, let’s get this out of the way:

  • It’s pronounced “nnn-yo-key oh gra-tan”
  • Gnocchi - Italian potato dumplings
  • Au gratin - French for “baked in a creamy sauce to crusty perfection”

This dish was inspired by my beloved Bon Appetit magazine - this recipe to be exact. Although the photos look sort of similar, the recipes are nothing alike. BA’s recipe calls for homemade gnocchi baked in a rosemary-infused heavy cream and studded with Gorgonzola Dolce cheese. I thought I could outsmart the magazine - silly me - by making a cheese sauce instead. The flavors all turned out right but the dish turned out much less creamy than I’d anticipated. I think this was because the gnocchi were really starchy.

Oh well. Not all recipes are perfect. And, I’m still learning :)

Although this recipe (in my opinion) didn’t work as a casserole, the dumplings and sauce may well work together if not baked. If anyone tests the idea out, please let me know how it goes! Also, this sauce works perfectly as the latter ingredient of mac & cheese - baked or not.

(Yield: 4 servings)

Ingredients:

1 package store bought frozen gnocchi

1 1/2 tbsp butter

1 heaping tbsp all-purpose flour

1 c whole milk

1 pinch ground nutmeg

1 c grated Gouda cheese

Salt/freshly ground black pepper

Procedure for sauce: Melt butter over low heat in a small saucepan. Whisk in flour. Whisk until combined and bubbling, about 60-90 seconds. Whisk in milk, raise heat to medium-low and bring to a simmer, whisking frequently. Season with nutmeg and generous pinches of salt and pepper. Simmer sauce, continuing to whisk frequently, until it has thickened. Add cheese, turn heat off, and whisk until melted.

And then…: Preheat oven to 375F. Cook gnocchi in salted boiling water for 10-12 min, until they have all floated to the top and recommenced simmering (or according to package directions). Drain, combine with sauce, transfer to a baking dish and cook for 25-30 min, until the top is golden brown. Remove from oven. Serve immediately.

Tomato and Cheddar Pie

I’ve been subscribed to Bon Appetit magazine for a while now. I’m surprised when I actually read it because in the age that we’ve living in, all information I could ever need is available on the internet, and I don’t have to wait til the middle of each month to get it in the mail. Yet I can’t help but look forward to that time each month. This magazine has great food stories and awesome, sophisticated recipes for home cooks. And I LOVE the “Prep School” section in the back where, usually, cool cooking techniques and other neat tricks are explained.

Anyway, usually I read it on the train, to and from the city, to drool find inspiration. I immediately dog-eared this recipe in the August issue. Tomato, cheddar and pie - three words that I find irresistible.

Although this recipe is meant for the summer, when tomatoes are in season, I couldn’t wait that long. And besides, we always have tomatoes in my house - it’s like a habit we brought with us from Ukraine that we just can’t break, even though out of season tomatoes are, let’s face it, pretty gross. But even the most flavorless tomato, when roasted, turns out to be the epitome of umami.

I hope the photos speak for themselves but DO YOURSELF THE FAVOR AND MAKE THIS DAMN PIE! It’s hands-down one of the most delicious things I’ve ever made. My mom and I almost finished it in one sitting, passing it back and forth to each other during dinner.

CLICK HERE FOR THE RECIPE*

I used my usual short-crust recipe instead of BA’s - I ran out of buttermilk.

Spinach and farmer cheese pastry roulade

This roulade is perfection: it has a crispy, buttery crust (my tried and true recipe), and a gooey, savory filling. If you are going to try any one of my recipes, do yourself the favor and make this roulade!

(Yield: 12 pieces)

Pastry:

2 c all-purpose flour

1 tsp salt

6 oz butter

½ c ice water

Filling:

1 tbsp butter

3 c chopped spinach

1 egg, beaten

1 c farmer cheese

1/2 tsp salt + 1/2 tsp black pepper

Start by making pastry: cut butter into small cubes and place into freezer for about 10 minutes. Place flour and salt in a food processor fitted with the steel blade attachment. Pulse for a few seconds to combine. Add the butter and pulse 10 to 12 times, until the mixture begins to resemble a coarse meal. With the motor running, pour the ice water down the chute slowly and pulse until the dough begins to form a ball. Place the dough onto a floured surface and knead quickly into a ball. Do not over-work! Wrap in plastic and refrigerate for at least 1 hour.

Make filling: Melt butter in a skillet over low heat. Add spinach and cook until wilted, about 2 min. Add egg, stir to combine and turn heat off. Stir in cheese, salt and pepper. Set aside.

Preheat over to 350F. Remove dough from fridge and place on a floured surface. Roll out into 13″-14″ long rectangle and place onto a baking sheet covered with aluminum foil. Spread filling onto dough leaving a 1″ border on sides and bottom, and about a 3″ border on top.

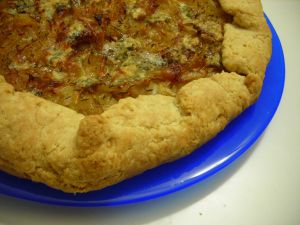
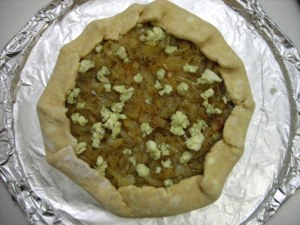
Fold dough over 3 times, starting from bottom. Leave seam-side down. Poke top gently with fork.

Place in oven and bake for 40-50 min, until golden brown.

Remove from oven and let cool for about 40 min. Then slice with serrated knife into 1″-thick pieces.

Store leftovers in an airtight container.

Chicken Pot Pie

Chicken pot pie is a satisfying, comforting, crowd-pleasing dish. I just can’t get enough of it.

Next time I will use less pastry on top though – it came out a bit too thick. I will also make individual servings for a better presentation.

(Yield: 6 servings)

Ingredients:

3 tbsp olive oil

1 lb boneless chicken breast, sliced

1 tsp poultry seasoning

1 medium carrot, chopped

1 celery stick, chopped

1 medium russet potato, peeled, cubed

2 oz cognac

3 tbsp all-purpose flour

1 c chicken stock

1/2 c milk

1/2 c canned peas, rinsed, drained

1 pastry crust (recipe follows. Or use store-bought.)

Chopped scallion for garnish

Salt/pepper

For pastry:

2 c all-purpose flour (or half pastry flour/half all-purpose)

½ tsp salt

¾ tbsp sugar

6 oz butter

½ c ice water

Make the pastry first: cut the butter into small cubes and place in freezer for about 10 minutes. Place the flour, salt and sugar in a food processor fitted with a steel blade. Pulse for a few seconds to combine. Add the butter and pulse 10 to 12 times, until the mixture begins to resemble a coarse meal. With the motor running, pour the ice water down the chute slowly and pulse until the dough begins to form a ball. Place the dough onto a floured surface and knead quickly into a ball. Do not over-work! Wrap in plastic and refrigerate for at least 1 hour.

On to the filling of the pie: heat the oil in a pot on medium-high heat. Add the chicken. Season with salt, pepper and poultry seasoning. Cook for about 4 min, stirring occasionally, just to brown. Take chicken out and set aside. Lower heat, add more oil if needed, and add onion, carrot, celery, potato and a pinch more salt. Cook until vegetables are just starting to sweat, about 6 min. Add cognac and cook 1 min until alcohol evaporates. Stir in flour and cook 1 min. Then add stock and milk. Cover with lid, bring to boil, reduce heat and simmer uncovered for about 6 min, until mixture starts to thicken. Stir in peas and chicken and turn heat off. Re-season if necessary (it’s the last chance you’ll have).

Remove the dough from the refrigerator and set on the counter for one minute. Place on a floured surface and roll out into a ¼”-thick circle, with the same diameter as the dish you will use for the pie (I used a Pyrex).

Pour the filling into a dish, cover with dough and cut off excess. Press dough into the edges with fork. Cut slits in the middle and all around the pie. Bake in a preheated 345F oven for 40-60 min, until the top is golden. Serve hot. Garnish with scallion.

Apricot and Thyme Tart

I got the idea for this tart from Cooking Light. In a recent issue, they featured an apricot thyme galette (galette/tart-is there a difference?). I was intrigued by the idea of thyme and apricots together.

I have a special relationship with apricots – when we lived in Ukraine, we had a huge apricot tree in the middle of the yard. Every year, we picked the apricots together with all of our neighbors. This fruit was as organic as organic gets, and it was delicious. Juicy, sweet and fragrant. Whenever I smell apricots now, it makes me feel nostalgic.

That’s the story, now here’s the recipe:

Ingredients:

Pastry:

2 c whole wheat pastry flour

½ tsp salt

¾ tbsp sugar

6 oz butter

½ c ice water

Filling:

6 ripe apricots (or just under 1 lb)

1 tsp sugar

½ tsp dry thyme

1 tbsp honey

Begin by making the pastry dough. Cut the butter into small cubes and place in freezer for about 10 minutes. Place the flour, salt, and sugar in a food processor fitted with a steel blade. Pulse for a few seconds to combine. Add the butter and pulse 10 to 12 times, until the mixture begins to resemble a coarse meal. With the motor running, pour the ice water down the chute slowly and pulse until the dough begins to form a ball. Place the dough onto a floured surface and knead quickly into a ball. (Work fast as to not warm the dough with the heat from your hands). Wrap in plastic and refrigerate for at least 1 hour.

Then, remove the pits from the apricots and slice lengthwise into ¼”-thick pieces. Set aside.

Remove the dough from the refrigerator and set on the counter for one minute. Place on a floured surface and roll out into a ¼”-thick circle, about 11” in diameter. Arrange the apricots on the dough so they face the same direction, starting from the middle, leaving a 1” border. Sprinkle with sugar and thyme and fold the edges over.


Bake for 40-50 minutes, until the edges are golden brown. Remove from oven. Place the honey in a bowl and microwave for a few seconds to thin it out. Using a pastry brush, brush it over the fruit gently. Cool for 20 minutes before serving.

Caramelized Onion and Blue Cheese Galette

I’ve attempted to make this galette (tart?) once before and it wasn’t a total failure but this time it was pure perfection. Looking back at everything I’ve ever cooked, this buttery, crispy, rich, pungent creation is definitely one of the best things I’ve ever made. This kind of dish requires lots of patience but it is definitely worth it. Don’t try to cheat time.

Last time I used goat cheese but this time I decided to go with blue. I don’t have a preference for either one. I find both cheeses to be excellent compliments to the sweetness of the caramelized onions. Also, I used half whole wheat pastry flour and half all-purpose but feel free to use all all-purpose.

(For the pastry)

Ingredients:

1 c whole wheat pastry flour

1 c all-purpose flour

½ tsp salt

1 tsp sugar

1 ½ sticks butter

½ c ice water

(For the filling)

Ingredients:

1 tbsp extra virgin olive oil

1 tbsp butter

4 large yellow onions, sliced

½ tsp salt

½ tsp black pepper

1 tsp sugar

1 tsp dried thyme

2 oz blue cheese, crumbled

Begin by making the pastry dough. Cube the butter and place in freezer for about 10 minutes. Place the flour, salt, and sugar in a food processor with the steel blade. Pulse for a few seconds. Add the butter and pulse 10 to 12 times, until the mixture begins to resemble a coarse meal. With the food processor running, pour the ice water in and pulse just until the dough starts to come together. Place the dough onto a floured surface and knead quickly into a ball. (Work fast here since you want the dough to keep cold.) Wrap in plastic and refrigerate for at least 1 hour.

Prepare the filling in the meantime. Place a large skillet on low heat and add the butter and olive oil. Place onions, salt, pepper and sugar into the skillet, stir and sauté for about 40 minutes, stirring occasionally. In the end, the onions should be brown and mushy, almost pasty.

After the hour is up, roll out the dough into a 1/3”-thick circle on a floured surface. Transfer onto a baking sheet lined with foil. Spread the onions into the middle of the dough leaving a 1” border. Sprinkle with thyme and cheese. Fold the edges over.

Bake for 40 minutes-1 hour, until the edges are golden brown.

The cheese melts into the onions, the onions melt into the pastry shell and the tart melts in your mouth.

Serve this tart with sweet white wine and the music of Edith Piaf – you’ll think you’re in Paris, I promise.